Burst Pipe? The First 60 Minutes: Vancouver Emergency Playbook
Water is pouring from a ceiling or spraying inside a wall. Right now, in the next hour, your decisions decide whether this is a $400 repair or a five-figure renovation — and whether insurance pays without a fight. This is the burst pipe Vancouver playbook: the exact sequence of moves, where the shutoff hides in every type of local home, how to thaw a frozen pipe without burning the house down, and what to document before you touch the mop.

The First 60 Minutes, Minute by Minute
Do these steps in order. The sequence matters: water first, power second, pressure third, paperwork last. Skipping ahead is how small emergencies become large ones.
Average Emergency Response
Vancouver, Burnaby, Richmond. 45–60 across most of Metro Vancouver, 60–90 in the Fraser Valley.
The Window That Decides Cost
How fast the main closes and drying begins separates a repair bill from a renovation.
Hours Before Mold Sets In
In Vancouver's humid coastal climate, wet wall cavities begin colonizing within two days.
Freeze & Burst Calls Since 2010
Emergencies our Red Seal crews have answered across 17 Metro Vancouver and Fraser Valley cities.
Minutes 0–5: Shut the main water — know where it is BEFORE you need it
This is the single most valuable minute in the entire playbook. Every minute the main stays open, municipal pressure (typically 50–80 psi in Metro Vancouver) feeds the break. Find and close the main shutoff now, before reading further. Where it lives depends on your home type:
| Home Type | Where the Main Shutoff Hides |
|---|---|
| Basement homes (much of Vancouver, East Van, New West) | On the front foundation wall where the service pipe enters — often at basement ceiling height near the front stairs, next to the water meter. A quarter-turn ball valve or older gate valve. |
| Crawlspace homes (Burnaby, North/West Vancouver, many splits) | At the crawlspace hatch near the front foundation wall, or above the ceiling insulation just inside the crawlspace entry. Bring a headlamp. |
| Condos & apartments | Unit shutoff in the laundry closet, bathroom access panel, or a ceiling hatch — plus the building main in the parkade (strata's valve). Water rising through floors: call the building manager too. |
| Garage-side entries (Surrey, Langley, Tri-Cities newer builds) | Near the water heater manifold or where the service enters through the garage slab — look for the pressure reducer and shutoff cluster. |
| Curb stop / street (all homes) | Under the metal cap at the property line. It needs a municipal long key — if the house-side valve fails, call us and the city utility rather than digging. |
If the house valve is seized or snapped (common on 30-year-old gate valves — a real problem in pre-1990 Vancouver stock), the curb stop is the fallback, and our emergency vans carry the keys. This week, not next freeze: go find your valve, turn it a quarter turn and back, and tag it with a ribbon or tag so anyone in the house can find it in the dark.
Minutes 5–10: Make it electrically safe
Water and electricity share a disaster zone only briefly before someone gets hurt. If water is anywhere near outlets, baseboard heaters, appliances, or the electrical panel: stand on dry ground, use one dry hand, and flip the breakers for the affected circuits at the panel — the kitchen, bath, and basement circuits first. Never touch a panel while standing in water; if the panel itself is wet or the water is rising toward it, leave and call BC Hydro's emergency line. If the burst is at a gas water heater or boiler, also close the gas valve at the appliance (quarter turn until the handle is crosswise to the pipe). You are not repairing anything yet — you are removing the two ways this gets worse.
Minutes 10–20: Drain the pressure, then call the two phones that matter
With the main closed, open the lowest faucets in the house — the laundry tub or a basement cold tap — and then the taps fed by the broken line, plus flush the toilets. This drains the remaining stored water out of the pipes instead of out of the burst, and relieves the trapped pressure that keeps feeding the leak. Then make two calls: us at 604-615-2212 (24/7; tell dispatch water is active and they triage you to the front of the queue), and your insurer's 24-hour claims line to open a file — early notice makes the eventual claim faster, and adjusters issue mitigation guidance on that first call.
Minutes 20–60: Document, rescue, contain
- Photograph and video everything before you touch it — the burst itself, the water path, soaked flooring, ceiling bulges, moved belongings. Time-stamped media is the backbone of your claim. Work wide-to-close on every scene.
- Rescue the valuables: electronics up off the floor, rugs rolled out, art and books to a dry room. Water wicks upward in drywall and fabrics — anything absorbent standing in water is losing value by the minute.
- Contain: towels at doorways, buckets under active drips, plastic sheeting over stacked items, furniture up on foil or wood blocks so stains do not bleed into wet carpet.
- Start moving air if it is safe: fans and a dehumidifier pointed at the wet zone, and in winter, gentle heat in the room. Insurance expects you to begin mitigation — do not wait for the adjuster's blessing to start drying.
- Do not open walls yourself beyond what drying requires — leave demolition choices to the pros unless water is actively trapped behind a bulging surface, in which case a controlled weep hole beats a collapse.
By minute 60 you should be able to say: water off, power safe, pressure drained, help en route, evidence recorded, drying started. That is what a well-run emergency looks like — and it is exactly the state our technicians walk into when the response call was made at minute 15 instead of hour three.
Why Pipes Burst: The Physics
The intuitive picture — ice spearing outward through the pipe wall — is wrong, and understanding the real mechanism tells you why some frozen pipes survive and where a burst will actually appear.
Water is one of the few substances that expands as it freezes — about 9% by volume. Inside a pipe, freezing does not happen all at once: an ice plug forms first where the pipe is coldest (an exterior wall, a drafty crawlspace, an uninsulated attic run), then grows along the pipe. As the plug lengthens, it seals a column of still-liquid water between the ice and the closed tap or fixture downstream. The continuing freeze pushes that trapped liquid water ahead of it — and water, unlike the ice, is essentially incompressible. Pressure between the plug and the closed valve spikes from a normal 60 psi to figures that can exceed 1,000 psi, far beyond what copper, and certainly what aging poly-B or thin-wall galvanized, is rated to hold.
Three practical consequences follow. First, the burst usually happens downstream of the visible ice, not at the freeze itself — typically at the weakest point: a solder joint, a galvanized threaded seam, a pinhole-corroded section. Ice at the cold spot is often intact; the pipe fails where you were not looking. Second, bursts frequently appear during the thaw, when the plug releases and pressurized water finally has somewhere to go — which is why a pipe that "survived the night" can split open at 9 a.m. as the house warms. Third, this is exactly why the open-tap mitigation in the thawing section works: an open faucet makes the system open-ended, so expansion pressure cannot build.
Vancouver's Freeze Patterns: When and Where Pipes Actually Break
Metro Vancouver is not a cold city — it is a mild city with occasional brutal weeks, and that combination is uniquely hard on plumbing. The classic pattern is the Arctic outflow: frigid interior air pours through the Coast Mountain passes, and the Lower Mainland gets −5 to −15°C temperatures combined with a biting wind for three to seven days, usually between mid-November and February. Snow is not the hazard — clear-sky outflow nights are the pipe-killers, because clear skies radiate heat out of walls and crawlspaces all night long.
The November 2024 freeze was the textbook case: an early, deep outflow arrived before homeowners had winterized anything — hose bibs still connected, irrigation lines charged, crawlspace vents open. Our emergency line ran at five times normal volume for a week, and the pattern repeated across every dispatcher in the region: burst supply lines in exterior walls, frozen crawlspace manifolds, split hose bibs leaking into foundations as pipes thawed, and vacant rental suites whose heat had been set at "vacation minimum." Insurance bureaus logged the event as one of the costliest water-damage stretches of the year in BC.
Where pipes freeze locally, in order of frequency from our call logs: north-facing exterior walls (kitchen and bath runs in 1950s–80s homes), crawlspaces with open vents (Burnaby and North Shore splits), garage ceilings and bonus-room floors (Surrey and Langley family homes), attic runs above insulation, hose bibs and sillcocks, and unheated utility sheds and laneway mechanical rooms. Fraser Valley communities — Abbotsford, Mission, Chilliwack — run a few degrees colder and a week or two longer than Vancouver proper, so the same house in Langley needs more prevention than its identical twin in Richmond.
Thawing a Frozen Pipe Safely
A frozen pipe with no leak is a watch-and-warm situation, not an emergency. The goal of thawing is to restore flow without creating the pressure spike or the fire that turns it into one.
The golden rule of thawing: heat the pipe from the open faucet end back toward the ice. You want water running out of the tap the moment the plug releases, so melt-water and pressure escape forward instead of building between the ice and the fixture. Open the affected faucet fully (and a nearby one too), then apply gentle heat to the accessible frozen section: a hair dryer on low or medium, moved continuously along the pipe; warm damp towels wrapped around the section and refreshed from a sink that still works; or a space heater warming the whole room or crawlspace — room heat is slower and safer than any direct attack. A heat gun at low setting and proper distance is acceptable in skilled hands; on PEX, keep all direct heat sources moving and modest, as plastic softens far below the temperatures copper shrugs off.
Water flowing again? Run it for several minutes and check every fixture on that line — you are listening and looking for the weeps and drips that appear after the plug moves. Found one? Valve off that branch if you can, towel under it, and you have graduated from "thawing" to "leak repair," which is a phone call.
- Never use an open flame or propane torch on a pipe. It is the single most common way burst-pipe events become house fires — and inside a wall cavity, you cannot see what the flame is touching: wiring, vapour barrier, dust, framing.
- Never pour boiling water over a frozen pipe or into a frozen trap — thermal shock can split copper, deform PEX, and scald whoever is kneeling below it.
- Never use an electric heater or heat gun while standing in water, and never leave any heating device unattended against a pipe.
And the option nobody considers: waiting is a legitimate strategy. If the frozen section is inside a finished wall, unreachable, and nothing is leaking — warm the house to 20°C, open the faucet, open cabinets on that wall, and let the building do the thawing overnight. If the pipe is intact, it survives. If it fails, it fails with the faucet open and the heat on — the gentlest possible failure mode, and the one most likely to be a small, repairable split. We are happy to attend frozen-pipe calls with our thawing equipment and thermal camera: sometimes the right professional move is arriving, thawing, confirming integrity, and leaving without a repair to bill.
Water running where it should not be? Call 604-615-2212 now.
24/7 live dispatch, Red Seal technicians, average 45-minute response in Vancouver, Burnaby and Richmond. Shut your main first, then call — and if it is safe, photograph everything before cleanup. Licensed BC-PL-2019-4421, $2M insured, direct billing for eligible insurance claims.
Active water discharge is always our first triage priority — a form is for quotes, the phone is for floods.
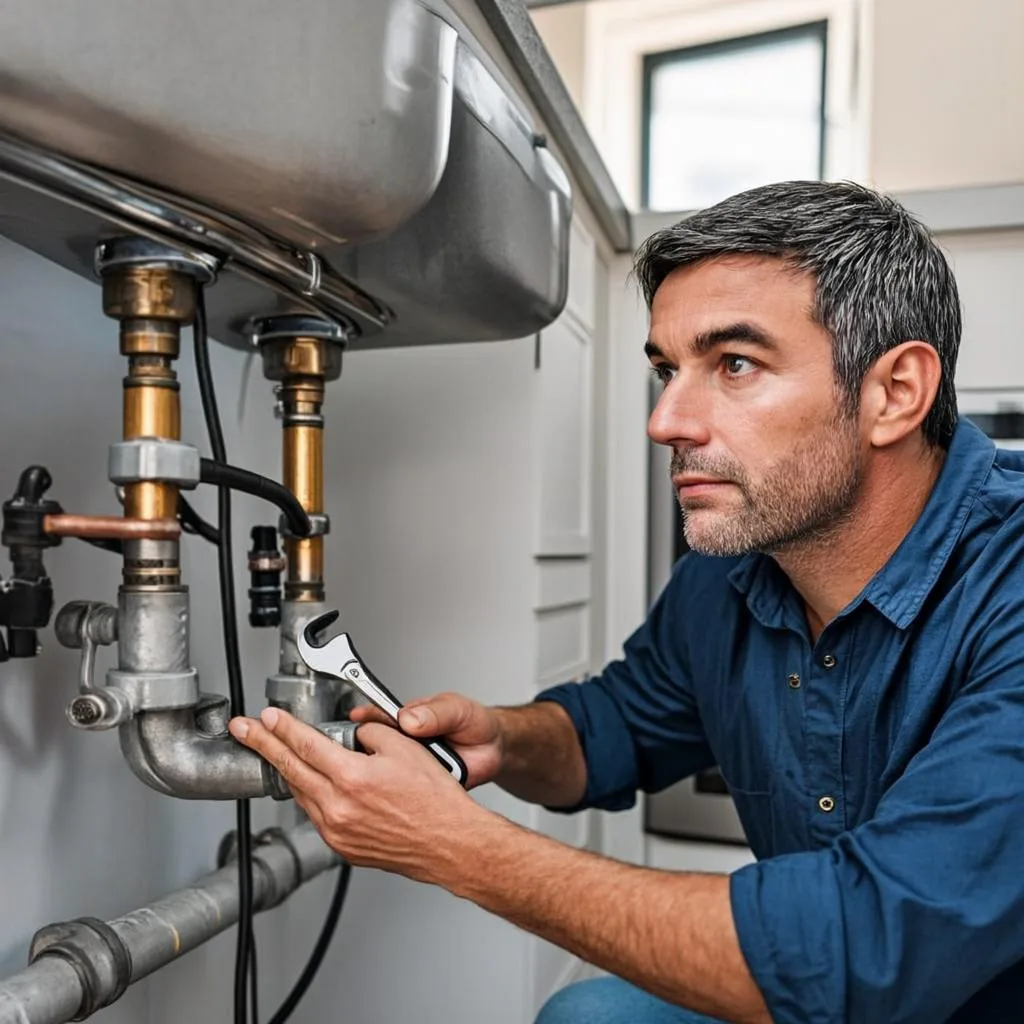
A $15 clamp and a $180 professional section repair both stop the water. Only one of them also stops the slow leak behind your drywall that you cannot see.
Temporary Repairs That Hold (and the Ones That Do Not)
If the break is accessible — a supply line under a sink, an exposed basement run, a visible joint — you can stop active discharge yourself and buy hours or days until a proper repair. Two field-tested options:
- Stainless pipe repair clamp ($15–40 at any hardware store): a rubber gasket with a bolted steel jacket. Centre the rubber over the split, snug the bolts evenly, hand-tight plus a quarter turn. This is the dependable option — it holds full pressure for weeks when installed on a clean pipe.
- Two-part epoxy putty ($12–20): knead, press firmly over and around the leak, and give it the label's cure time before repressurizing. Works well on pinholes and weeping joints, awkward spots where a clamp will not seat, and galvanized seams. Roughen and dry the pipe surface first — epoxy holds to the pipe, not to the water film on it.
- Hose-and-jubilee or bicycle-tube wraps: emergency-of-the-emergency fixes that buy minutes, not hours. Acceptable at 11 p.m. with a bucket underneath.
What all of these have in common: they are patches on a pressurized line, not repairs. A clamp on a pinholed copper line stops today's leak and hides the fact that the whole run is thinning; epoxy on a split poly-B joint hides nothing about the rest of the poly-B. Water off, pressure drained, pipe dry, patch on — and then book the real repair while the patch is still holding. Tell us what you fitted and where: it tells our technician what parts to bring before rolling.
What Professional Burst Pipe Repair Costs
Three line items make up every burst pipe repair: the pipe work itself, the access to get at it, and the make-good afterward. Here is what they realistically run in Metro Vancouver.
| Line Item | Typical Cost | Notes |
|---|---|---|
| Accessible section repair | $180–420 | Cut out the split, replace with copper or PEX, re-solder or crimp, pressure-test |
| Emergency call-out + diagnosis | $89, credited to repair | Flat rate; night/weekend premium is a flat $120–180, disclosed up front |
| Access: open drywall/ceiling | $150–400 per opening | Only where the pipe is concealed; cuts are made surgically along stud lines |
| Access: crawlspace or slab work | $200–600 | Confined-space time, insulation removal and reinstatement |
| Make-good: patch and refinish | $150–350 per opening | Drywall, tape, mud, paint-ready — or we coordinate your painter |
| Shutoff valve replacement | $189–280 | Seized or snapped mains are common co-repairs; adds curb-stop work if it fails too |
| Whole-home PEX repipe | from ~$8,000 | The right answer when the burst is a symptom of poly-B or galvanized end-of-life |
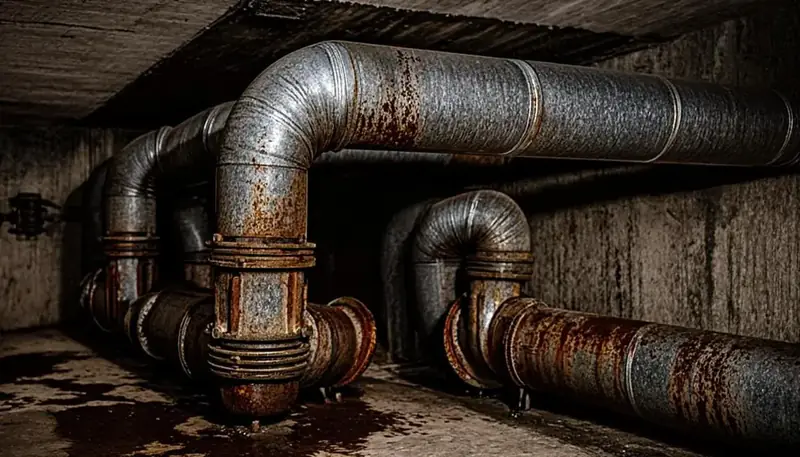
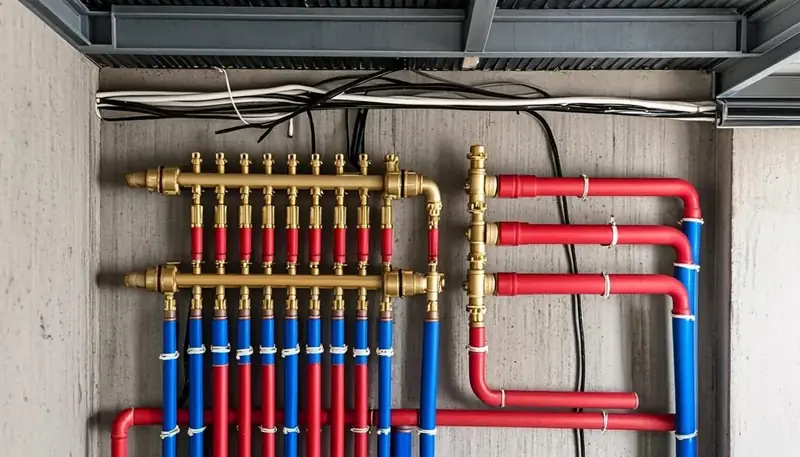
The judgment call that saves or costs thousands: when one burst is an isolated failure — a frozen sillcock, a single solder joint that let go — spot repair is correct and complete. When the burst pipe is poly-B or galvanized and the material itself is failing, spot repairs become a subscription service you never signed up for: a new leak elsewhere within months, each with its own access costs and wall repairs. Age and material decide it. If your home was built or repiped between roughly 1975 and 1995 and the burst is grey or blue plastic pipe, ask for the repipe conversation before authorizing the second spot repair — the full PEX repipe decision guide is on the blog, and our plumbing page covers the repipe service itself.
Hidden Damage: Moisture, Mold and the 48-Hour Clock
The pipe is repaired, the floor is dry to the touch, and the damage is not done — it is just invisible. Water in a building does not leave the way it came in.
Drywall wicks water upward through its core and paper faces — a two-inch flood at the floor can saturate a full sheet to 30 cm or more, and the visible tide-line understates the internal moisture every time. Behind it, fiberglass batt insulation holds water against the stud faces, OSB sheathing swells, and the paper backing on batt insulation becomes a food source. In Metro Vancouver's humid coastal climate, mold colonization in a wet enclosed cavity typically begins within 48–72 hours at our normal indoor temperatures; by two weeks, a category of remediation that started as "dry it out" has become "remove and rebuild."
This is why professional water damage assessment is instrument-based, not eyeball-based. A moisture meter reads the percentage of moisture inside the drywall and framing — we map a grid across the affected wall and compare against a known-dry baseline elsewhere in the house, because "dry to the touch" and "dry in the core" are different numbers by a factor of ten. A thermal camera shows the cold patches where evaporation is still actively occurring inside the assembly — evaporating water reads cold, and the camera finds the wet columns your eyes cannot. Between the two instruments, we can tell you which wall sections need air movement, which need opening, and which are genuinely fine.
- Structural drying: commercial dehumidifiers and air movers running for 2–5 days, with meter readings tracked until materials return to baseline — the step that prevents most mold claims.
- Baseboards and casings: prime wicking paths; removal is often cheaper than drying them in place.
- Under-lay and carpet: carpet may survive; the foam underlay never does, and it is always replaced.
- Laminate and engineered floors: water enters at the joints; planks swell and the floor is typically a full replacement, not a repair.
- Cavities that stayed wet: if readings will not come down, the wall gets opened — that decision gets easier when it is documented for insurance first.
The Insurance Claim, Done Right
Sudden and accidental water discharge is one of the most-claimed and best-covered perils in comprehensive BC home policies. Claims go sideways for predictable reasons — here is how to keep yours on the rails.
Report early, mitigate immediately
Call the claims line on day one, even before you know the full scope. Every comprehensive policy carries a duty to mitigate — you are contractually required to take reasonable steps to limit the damage. Shutting the water off, removing soaked contents, and starting drying are not just good practice; they are your obligation under the policy. Homeowners who wait for the adjuster before drying a wet wall have funded their own mold remediation.
Document like an adjuster
Photos and video before cleanup, then again after each stage. Keep every receipt — the dehumidifier rental, the hotel night, the buckets and towels, our invoices. Note dates and times of each call. A chronological file with time-stamped evidence moves through adjustment in weeks instead of months.
Let the professionals scope the damage
Our moisture mapping and thermal imaging reports are written in the format adjusters work from: affected areas, readings, drying logs, and what had to be opened and why. We can deal directly with your insurer — direct billing where the policy allows, so you are not financing a five-figure drying and repair job on your credit card while the claim processes. Your deductible (typically $500–1,000, sometimes $2,500+ on older coastal policies) still applies, and it is deducted from the settlement, not paid at the door.
Know the exclusions before they surprise you
The classic denial: water damage from a pipe that froze in a home left unheated during a vacation — many policies treat that as preventable, not sudden. Long-term slow leaks and seepage are also commonly excluded, which is what distinguishes a burst (covered) from a six-month weep (maintenance). And sewer backup needs its own rider on most policies — a separate conversation from a supply-pipe burst. Read the water sections of your policy this week, not during the flood.
Prevention That Actually Works (Ranked by Value)
Every measure below is ordered by how much freeze it prevents per dollar, from the cheapest big win to the structural fix for chronic homes.
| Measure | Cost | What It Does |
|---|---|---|
| Insulate exposed pipe runs | $2–4 per ft | Slips over pipes in crawlspaces, along exterior walls, in attics. Cheap foam is fine for mild exposure; use thicker or double-layer on north walls. |
| Heat tape / heat cable | $40–80 per run | Thermostat-controlled cable warms the pipe directly. The correct answer for pipes that have frozen before. Use CSA-certified cable and plug into a live GFCI. |
| Seal air leaks at penetrations | $10–15 of expanding foam | Wind blowing through a sill or vent gap freezes pipes that are otherwise fine. Seal where pipes enter walls, around hose bibs, at crawlspace vents. |
| Frost-proof hose bibs | $180–280 installed | Valve seats inside the heated wall instead of at the spout. Also: disconnect and drain hoses every October. |
| Crawlspace vent management | $0 | Close and insulate vents for the outflow season, keep crawlspace above ~7°C with a small safe heater if it has plumbing. |
| Smart water sensors + auto shutoff | $40–100 sensors, $300–700 auto valve | Sensors under the water heater, dishwasher, and in the crawlspace alert your phone; an auto-shutoff valve closes the main on detection — the closest thing to a flood-proof house. |
| PEX repipe (chronic homes) | from ~$8,000 | Removes failing poly-B/galvanized from the equation. PEX tolerates freezing far better — it flexes instead of splitting in many freeze events. |
And the drip faucet — the folk remedy that is genuinely physics. Two mechanisms make it work: moving water freezes at a lower temperature than still water (flow carries heat into the pipe section from the warm side of the house), and an open tap gives pressure somewhere to go, so the expansion of a forming ice plug cannot build the hundreds of psi that actually split pipes. The details matter: drip the cold tap fed by the exposed pipe — usually the one on the north-facing exterior wall — not just any faucet; a pencil-thin stream during a serious outflow, a drip during moderate cold; and run the single-handle taps warm occasionally so both lines move.
One prevention item people skip that pays for itself: exercising the main shutoff twice a year. A valve that has not turned since 1998 does not turn in an emergency — it snaps, and now the municipal curb-stop key is the only thing between you and the flood. Thirty seconds, twice a year, and the valve works when it matters. If yours is already seized, replacing it ($189–280) before the next freeze is the cheapest insurance on this page.
Vacation and Cold-Snap Prep: The Insurance-Proof House
The most expensive burst-pipe calls we attend share one detail: the house was empty. A family flies to Mexico for the holidays on December 18, the furnace fails or the outflow deepens on December 22, and the burst runs for days before a neighbour notices the icicles growing from the soffit. Those are five-figure and six-figure losses — and the insurance conversation is harder, because an unheated vacant home sits close to the maintenance exclusion.
The gold-standard prep for a winter absence, in order of commitment: set the thermostat no lower than 13°C and verify which thermostat zones actually control which spaces; shut the main and drain the system (open the low taps, flush the toilets dry) if you will be away more than a couple of weeks; leave cabinet doors under sinks open on exterior walls; have a neighbour or family member with a key walk the house every 48–72 hours — ideally someone who knows where the main is; and add smart sensors with remote alerts so your phone knows about water before anyone's shoes do. Frost-sensitive details: drain the evaporative line to your furnace humidifier, shut and drain the ice-maker line, and close crawlspace vents.
For rental and secondary suites — a large share of Vancouver's housing stock — the same rules apply with a landlord's twist: a vacant suite between tenants in January with the heat off at the panel is a burst looking for a date. Keep a minimum heat in every space with plumbing, document it, and if a tenant's absence overlaps an outflow, say so in writing. And if you are reading this in October: the full seasonal checklist (gutters, sump, furnace, hose bibs, the whole nine yards) lives in our Vancouver winter prep guide, and the emergency-specific triage page is our 24/7 emergency service page. Bookmark both before the first outflow — search history is a poor playbook at 2 a.m.
Burst Pipe Questions, Answered Fast
Basement homes: on the front foundation wall where the service enters, usually near the basement ceiling or under the front stairs. Crawlspace homes (common in Burnaby and the North Shore): at or just inside the crawlspace entry near the front wall. Condos: a unit shutoff in the laundry closet, bathroom access panel or ceiling hatch, plus the building main in the parkade. And every property has a curb stop under the metal cap at the property line — that one needs a municipal key, which our emergency vans carry.
No to both, and this is the safety line of the whole article. Open flame on pipe — especially inside a wall cavity — starts house fires, and it is the most dangerous thing people do during freezes. Boiling water adds thermal shock that splits copper and deforms PEX. Use a hair dryer on low, warm towels, or room heat from a space heater, always with the affected faucet open and working from the tap back toward the ice. And if the frozen section is out of reach with no leak yet, warming the house and waiting is a legitimate plan.
Yes — it is physics, not folklore. Moving water carries heat into the pipe and freezes at a lower temperature than still water, and an open tap gives the expansion of forming ice somewhere to escape instead of building pressure between the ice plug and a closed valve. The trick is dripping the right faucet: the cold tap fed by the exposed or exterior-wall pipe, at a pencil-thin stream during serious outflow nights. A drip at any random faucet does little for the pipe that matters.
An accessible section repair runs $180–420, with the $89 diagnostic credited toward it and a disclosed flat $120–180 premium for night and weekend work. Concealed pipes add access: $150–400 per drywall opening and $200–600 for crawlspace or slab work, plus $150–350 per opening to make good afterward. If the burst revealed failing poly-B or galvanized piping, a whole-home PEX repipe (from about $8,000) is usually the better spend than a second spot repair.
Sudden and accidental discharge is covered under most comprehensive BC policies, minus your deductible. You must mitigate — water off, drying started — and document everything before cleanup. The classic exclusion is freezing in a home left unheated during an absence, and long-term slow leaks are treated as maintenance rather than claims. We write moisture-mapping reports adjusters can use and can bill eligible insurers directly. For events under roughly $2,500, self-paying often beats the premium and loss-history consequences of a small claim.
Call 604-615-2212 — the line is answered 24/7 and active water discharge is our first triage priority. Average response is 30–45 minutes inside Vancouver, Burnaby and Richmond, 45–60 minutes across most of Metro Vancouver, and 60–90 minutes in the Fraser Valley. If you are calling during a regional freeze event, tell dispatch water is actively running; that single fact moves you to the front of the queue ahead of every no-water and frozen-pipe call.
Emergency Services From the Same Licensed Crew
24/7 Emergency Service
24/7 emergency plumber Vancouver dispatch — burst pipes, floods, no-heat and gas emergencies, burst pipe emergency response averaging 45 minutes.
Plumbing & Repipes
Burst pipe repair, drain cleaning in Surrey and full PEX repiping in Metro Vancouver for poly-B and galvanized homes.
Water Heaters
A burst tank is the burst pipe's cousin — same first hour, same insurance rules. Same-day hot water tank replacement across Metro Vancouver.
Heating & Furnace
Freeze emergencies and heating failures arrive together — emergency furnace repair and no-heat response keep the house warm enough to protect every pipe.
Related Guides From Our Blog
How to Winter-Prep Your Vancouver Home
The autumn checklist that deletes most November-to-February emergencies — pipes, sumps, furnace, hose bibs and more.
Emergency GuideThe Emergency Plumber Guide for Vancouver Homeowners
Full triage list of what counts as an emergency, honest emergency pricing, and how dispatch actually works.
Leak DetectionHow to Detect Hidden Water Leaks Before They Cost Thousands
Meter tests, moisture mapping and the places Metro Vancouver homes leak silently — catch them before they burst.
Written by the on-call crew that has answered 1,500+ freeze and burst emergencies across Metro Vancouver since 2010 — including the November 2024 event at five times normal volume. Every response time, price range and shutoff location in this playbook comes from calls we actually ran. Water running right now? Call 604-615-2212 first — meet the team after the mop is down.
Get Your Free Quote in Vancouver & Surrey
Water pouring right now? Call 604-615-2212 — the form is for everything else. Tell us about a repair that is holding, a frozen pipe you want inspected, a shutoff valve that needs replacing, or a repipe you are pricing before the next freeze, and we will call back within 15 minutes during business hours with flat-rate written pricing. No obligation, and never a fee for choosing to think it over.
Why Homeowners Choose Us
- 24/7 live dispatch — average 45-minute emergency response
- 1,500+ freeze and burst emergencies answered since 2010
- Red Seal licensed, $2M insured, WorkSafeBC covered
- Flat emergency pricing disclosed before we roll
- Moisture-mapping and thermal imaging for insurance claims
- Direct billing to eligible insurers
- 4.9 stars from 512 verified reviews