The Honest Answer Up Front
Trenchless sewer repair means replacing or rehabilitating your lateral — the pipe from your house to the city main — without excavating the whole run. There are exactly two methods that matter in British Columbia: CIPP (cured-in-place pipe) lining, where a resin-saturated felt tube is pulled or inverted into the old pipe and cured into a seamless new pipe inside it, and pipe bursting, where a conical head fractures the old pipe outward while a new HDPE pipe is pulled in behind it. Lining typically runs $80 to $250 per foot installed in Metro Vancouver; bursting runs $100 to $300 per foot where soil and layout cooperate. Against open-cut excavation at $150 to $400 per foot plus driveway, landscaping and sidewalk restoration that can add $5,000 to $20,000, the trenchless premium argument usually makes itself.
The honest part: trenchless is conditional. A camera inspection must first prove your line is a candidate — no significant belly or sag (lining locks the slope in place forever), no collapse (bursting needs a continuous path or a staged approach), and reasonably intact joints for lining to have something to bond against. Roughly one in five lines we camera in New Westminster and Burnaby — the heritage clay-tile heartland — fails candidacy on slope alone, and any contractor who quotes trenchless before running a camera from the cleanout to the city main is selling, not diagnosing.
What it costs you to find out where you stand: the camera inspection at $250 to $400, often bundled into the $89 diagnostic credited to any completed repair, with the video and depth-marked findings in your hands afterwards. Every quote we write starts from that footage — this guide will teach you to read it the same way.
0 CIPP lining
Per foot, installed, with the pre-lining cleaning and camera work included. Most Metro Vancouver residential lines run 40-80 feet.
0 pipe bursting
Per foot where conditions allow — the method that gives you a brand-new pipe rather than a liner inside the old one.
0 access points
The digging trenchless actually requires: one small hole at each end of the line. Everything between them stays untouched.
0 design life
Installed CIPP liners and burst HDPE pipes both carry 50-year design lives — longer than most of the houses around them.
What “No Dig” Actually Means (and What It Doesn’t)
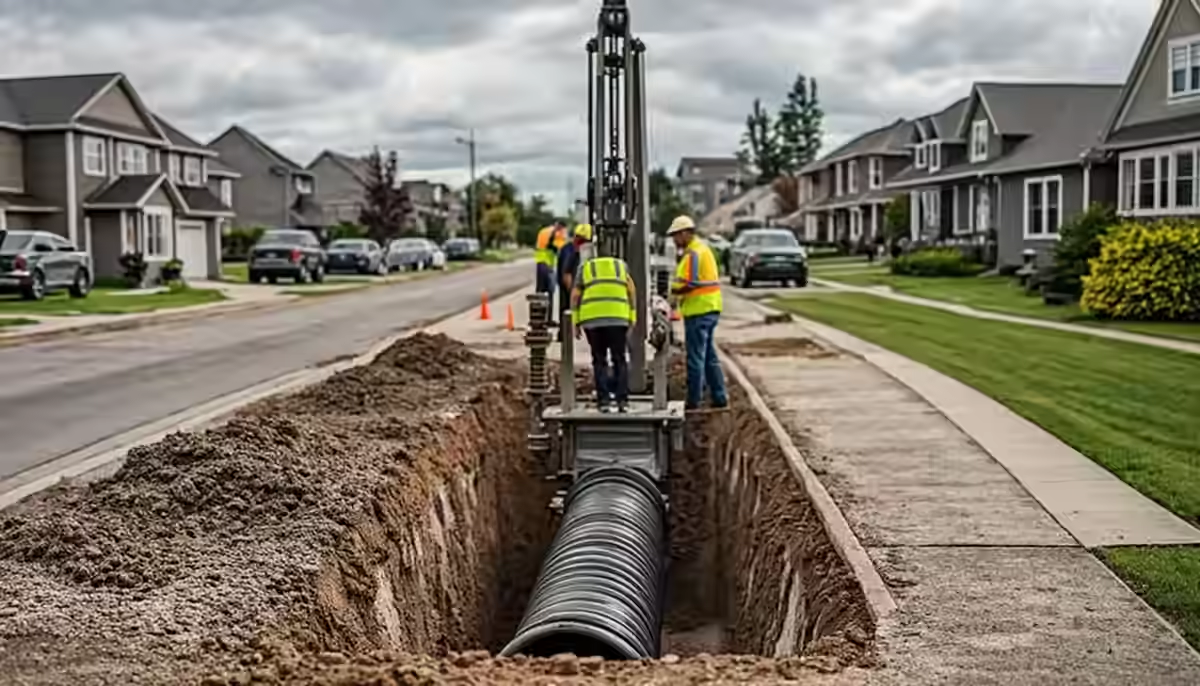
"No dig" is marketing shorthand, and it oversells by exactly two holes. Every trenchless method still needs access: one point to insert the liner or bursting head, and one point to receive it. On a typical Metro Vancouver lot that means a small excavation at the house cleanout or foundation wall, and a second at the property line or city connection — usually a 3x3-foot hole each, positioned to minimize restoration. Between those two points, the lawn, the driveway, the mature rhododendrons and the interlock stay exactly as they were.
What trenchless does not mean is "no mess, no disruption, half price." The crew still needs equipment access, hot-water curing or steam units for many resins, and typically a full day for lining and a day to a day and a half for bursting. Water is off for hours, not days. And the price per foot is HIGHER than open-cut per foot — the savings come from what you do not have to restore afterwards. On a line that runs under a lawn and nothing else, open-cut is sometimes the cheaper honest answer, and a good contractor will say so.
The decision mathematics in this market almost always favours trenchless anyway, because our lots are old and dense: the sewer under a 1960s Burnaby driveway also runs under the sidewalk approach the municipality requires you to restore to spec, or under a lane, or under two metres of concrete someone poured in 1972. The restoration line item is where open-cut quotes quietly double.
Method 1: CIPP Lining — A New Pipe Inside the Old One
Cured-in-place pipe lining is the more common trenchless choice in Metro Vancouver, and the concept is elegant: a flexible felt tube soaked in thermosetting resin is winched or inverted into your cleaned sewer, pressed against the old pipe wall by an inflatable bladder, then cured with hot water, steam or UV light until it hardens into a jointless, root-proof pipe that nominally meets or exceeds the structural rating of the pipe it replaced. The finished wall is thinner than the original — typically 4.5 to 12 millimetres depending on diameter and structural class — and it bridges small cracks, seals joints, and eliminates every root entry point in one continuous sweep.
The prep is the whole job. The line must first be cleaned to bare pipe — usually hydro-jetting at $500 to $900 — because lining over grease, scale or root mass bakes those defects permanently into your new sewer. Then the camera confirms the line holds its shape, the service connections (your kitchen, laundry and downpipe tie-ins) are located by camera and mapped, and after curing the reinstatement cutter reopens each connection robotically. A crew that skips or rushes the reinstatement step creates the classic post-lining complaint — slow drains on one fixture — which is a workmanship defect, not a lining failure.
Where lining shines locally: cast iron and concrete lines under Vancouver and Burnaby basements and driveways, clay tile with root intrusion at every joint in New Westminster and East Vancouver, and anything under a structure. Where it is disqualified: bellies (the liner follows the sag, and you have spent real money preserving a puddle), fully collapsed sections, and lines where the host pipe has deformed into an oval below the roundness tolerance. The smell-and-gurgle symptoms that bring us out often turn out to be exactly those disqualifiers — which is why the camera comes first, always.
Method 2: Pipe Bursting — Out With the Old, Literally
Pipe bursting is the method when you want a genuinely new pipe rather than a liner: a pneumatic or hydraulic bursting head is pulled through the old line from the insertion pit to the reception pit, shattering the existing clay, concrete or cast iron outward into the surrounding soil while a butt-fused HDPE pipe is pulled in behind it, nose to tail. You finish with a brand-new, seamless, root-immune pipe with a 100-year material life, an improved diameter if the soil allows upsizing, and no reliance on the structural condition of anything that was there before.
Bursting tolerates what lining cannot: offset joints, moderately deformed pipe, heavy scale, even short collapsed sections that a camera can still pass through. It needs competent soil — dense saturated clays, large boulders, or a previously-slurried trench can defeat the head or heave the ground — and it needs a straight-ish run with enough depth, because the head pushes fracturing force outward. It also cannot jump service connections the way a liner can be reinstated: each tie-in must be reconnected open-cut at small excavations, which is factored into the per-foot price.
In our market, bursting earns its premium on long runs under lawns, lanes and driveways in Surrey, Langley and the valley, where lots are deeper and the sewer runs 60 to 100 feet. On short 30-foot Vancouver Special laterals, lining usually wins on price and speed. Both methods end at the same place: a sewer you will never think about again.
| Factor | CIPP Lining | Pipe Bursting | Open-Cut |
|---|---|---|---|
| Typical cost (60 ft installed) | $4,800-$15,000 | $6,000-$18,000 | $9,000-$24,000 + restoration |
| Cost per foot | $80-$250 | $100-$300 | $150-$400 |
| Time on site | 1 day | 1-1.5 days | 2-5 days + restoration |
| Digging required | 2 small pits | 2 pits + service reconnects | Full trench |
| Fixes roots and cracks | Yes | Yes | Yes |
| Fixes bellies/sags | No — locks them in | Often (new slope possible) | Yes |
| Tolerates deformed pipe | Limited | Yes | N/A (removes it) |
| New-pipe material life | 50-yr design life | 100-yr HDPE | 50-100 yrs by material |
| Restoration costs | Minimal | Minimal | Driveway/landscaping/sidewalk $5,000-$20,000 |
Lining vs bursting vs open-cut on a typical 60-foot Metro Vancouver residential lateral.
The Candidacy Rules: When Trenchless Is a Mistake
The camera verdict comes down to four conditions, and you can follow along on the footage yourself. Slope: the line should fall steadily toward the city main — in Metro Vancouver typically a quarter-inch per foot, though older lines vary. A belly of any significance means lining will create a permanently ponding sewer that collects debris and smells, and bursting may or may not correct it depending on how the head tracks; a true grade correction usually means excavation for at least the sagged section. Shape: the host pipe must be round enough for the liner to press uniformly; an ovalized clay section under a driveway load is the classic hidden disqualifier. Continuity: the camera must pass from cleanout to main without a collapsed section it cannot traverse. Structural extent: lining can bridge spot cracks and leaking joints, but a line that is failing everywhere is sometimes better replaced than wrapped.
The mistake we see homeowners make is buying trenchless as an ideology — "I refuse to dig up my garden" — and then paying twice: once for a liner that sealed in a belly, and again for the excavation that was always going to be necessary. The honest sequencing is camera first, verdict second, method third. Our technicians mark the footage with depth, position and condition at every defect, and the candidacy call is written into the quote with the timestamps so you can see exactly which section decided it.
One more local note: municipalities care how you connect. The city-owned main and often the last few feet to it have specific reconnection requirements — in some areas a mandatory open-cut at the connection regardless of method, in others an approved saddle standard. A contractor who does not check the municipal standard before quoting is guessing at a line item that can move the price by $1,500 to $3,000.
What Actually Drives the Price
Per-foot numbers are the headline, but four factors move the final invoice more than the footage. Diameter: most residential laterals are 4 or 5 inches, but upsizing to 6 — sometimes worth it on shared lines or chronically undersized old sewers — increases liner material and bursting force requirements noticeably. Depth: a line at 8 feet needs bigger pits, more shoring, and more careful compaction than one at 4 feet, and depth is set by your basement depth and the city main, not by choice. Access: a cleanout at the foundation and a reachable property-line connection keep pits small; no cleanout means making one, and a connection under the sidewalk means a municipal-cut permit and restoration to city spec.
Condition and prep: a line that hydro-jets clean in an hour prices differently from one that needs root cutting, multiple passes, or a descale on cast iron — prep can swing $500 to $1,500 before the trenchless work begins. And method premium: bursting runs higher per foot but sometimes wins on total because it tolerates worse conditions without staged excavation. Every legitimate quote shows footage-based pricing with these factors itemized, not a single lump number multiplied by gut feel.
For context against the alternatives on this site: main-line snaking runs $280 to $650 and buys time, not rehabilitation; hydro-jetting at $500 to $900 restores full flow and is the required prep before lining anyway; and a full backwater valve installation at $2,500 to $5,000 is frequently the right companion investment when the sewer is opened for access, because the same pits serve both. Our flat-rate pricing page explains how every quote here is built.
Your Sewer's Birthday Matters: The Metro Vancouver Stock
The region digs in archaeological layers. New Westminster and East Vancouver carry the oldest clay-tile laterals — 1920s to 1940s salt-glazed tile in 2 to 3-foot sections with belled joints, every joint a root invitation after eighty years of ground movement. Vancouver Specials and mid-century Burnaby stock added concrete pipe in the 1950s to 1970s, which root-rots and sulphide-corrodes differently but fails just as finally. Surrey, Langley and the valley subdivisions of the 1980s onward mostly got PVC, whose failures are fewer and usually installation-related — crushed sections from poor bedding rather than material decay.
What that means for method: heritage clay with joint-by-joint root intrusion and decent slope is the textbook lining candidate — the liner seals every joint in one pass and the cast of the old pipe barely matters. Concrete with crown corrosion is often better burst — the material has lost structural capacity a liner only partially restores. Young PVC with a single crushed section under a re-paved driveway is the surgical case: a short open-cut of the crushed section, or a point liner repair, beats rehabilitating a whole line that has forty years of life left in it.
Depth plays a regional role too. North Shore and Burnaby hillside homes run deeper laterals — more cost per pit, stronger case for trenchless. Richmond and Delta flatland lines sit shallow in soft peaty soils that burst through beautifully but that need dewatering care on open cuts. If you know your home’s decade, you already know your sewer’s likely material — the camera confirms it in the first ten feet.
The Day Of: What Actually Happens at Your House
A lining day runs like clockwork or not at all. Morning: the crew sets protection, opens the two pits, and runs the final pre-liner camera pass to confirm nothing shifted since the quote. Mid-morning: the wet-out liner (often pre-wet at the yard) is positioned, and depending on system — pull-in-place or inversion — inserted and pressurized against the host pipe with the calibration bladder. Afternoon: curing, by hot water recirculation, steam, or UV light train depending on resin system, monitored by temperature probes the lead tech reads like a seismograph. Late afternoon: cool-down, bladder removal, the robotic cutter reinstates each service connection while the camera watches, and the final inspection footage is shot for the record. Pits are backfilled and compacted the same day where possible.
A bursting day trades chemistry for physics. The HDPE string is butt-fused to length in the lane or driveway, the bursting head is rigged to the winch line, and the pull begins — steady, monitored, with the old pipe fracturing outward as the new pipe feeds in behind. Service connections are reopened at small excavations and reconnected with saddles, and the final camera run verifies grade and alignment of the new pipe before reinstatement. The tell of a good crew is boring: constant instrument readings, no improvisation, and a wrap-up that leaves two neat patches of new sod or concrete.
Your part in both cases: water off for the working hours (we schedule to keep it to one day), clear access to the cleanout and property line, and a place for the curing or winch equipment. Pets and small humans away from the pits, and the usual neighbourly heads-up that a truck will be out front until late afternoon. That is the entire disruption — the rest of the property should be indistinguishable from the morning.
- May I see the full camera footage to the city main, with defects and depths marked?
- Is my line a lining candidate, a bursting candidate, or neither — and specifically why?
- Is there any belly or sag, and does the method fix it or preserve it?
- What is the resin system and cure method, and what is the finished wall thickness?
- Who reinstates the service connections, and is it robotic-cut and camera-verified?
- What is the warranty — years, transferable, and covered workmanship specifically?
Warranties, Lifespans and What the Fine Print Should Say
A properly installed CIPP liner carries a 50-year structural design life and typically arrives with a 10 to 25-year installation warranty from reputable contractors; a burst HDPE pipe carries a 100-year material life and similar installation warranty terms. The gap between design life and warranty is normal in construction — the warranty covers workmanship (the things installation can get wrong: incomplete cure, missed reinstatement, poorly fused joints), while the design life is the engineered expectation of the product itself.
The fine print to insist on: the warranty names the method and the extent (full length, reinstated connections included); it is transferable to a new owner, because sewer work is exactly the kind of thing a buyer’s inspector asks about; and the final camera footage is part of your paperwork, since it is the before/after evidence any future claim would rest on. Our quotes include the post-work video as a deliverable, the same way our plumbing work includes written documentation of what was found and fixed.
One warning from the honest-files: warranties that require annual "maintenance" inspections sold by the same company, or that exclude root intrusion entirely on a product whose main selling point is root-proofing, are structured to never pay out. A sewer you own outright — liner or new pipe — should not come with a subscription.
Insurance, Permits and the City Connection
Two paperwork threads run through every lateral job. The first is the municipal one: most Metro Vancouver municipalities want to know when you touch the connection to their main — some require a plumbing permit for the lateral work itself, others only for the city-side connection, and a few have rebate programs that quietly require the paperwork to have been done properly. Sewer backup prevention work, including backwater valves installed during the same access, has attracted municipal cost-share programs that have covered meaningful fractions of the bill in New Westminster, Burnaby and other cities; eligibility usually means permits and inspections done by the book, which is our default mode anyway.
The second is insurance: insurers increasingly ask about sewer lateral condition on older homes, and a documented rehabilitation — camera footage before, method, warranty after — is exactly the file that answers an underwriter’s question at renewal. The backwater valve guide covers the flood-prevention side; the trenchless file covers the condition side. Together they are the strongest insurance posture a homeowner with an old lateral can present.
None of this paperwork is optional in practice — it is what separates a rehabilitated sewer from an undocumented one at resale. Buyers’ inspectors ask for the video; municipalities ask for the permit; insurers ask for the story. The file we hand you answers all three.
The DIY Question, Answered Honestly
Nothing in this pipeline is homeowner territory, and not because of trade-union sentiment: the work involves heated resins or pressurized bursting systems, robotic reinstatement cutters, butt-fusion equipment, confined-space entry at the pits in some configurations, and a municipal connection with legal requirements attached. The BC Plumbing Code and the gas-and-plumbing licence regime (ours: BC-PL-2019-4421) exist because the failure modes are property-scale: an uncured liner that delaminates, a missed reinstatement that slow-drains a kitchen for years, a burst pull that heaves a neighbour’s lawn.
What IS yours: the vigilance that catches problems early. Watch for the warning sequence — gurgling first, then slow drainage on the lowest fixtures, then backups after heavy rain if the city main surcharges — and order the camera before the emergency. A planned lining day costs thousands less than the same job priced from a flooded basement on a Sunday, with the after-hours flat $150 premium and the 24/7 emergency line handling the triage while the permanent fix gets scheduled properly.
And the annual ritual that costs nothing: know where your cleanout is, keep it clear and capped, and run water in every fixture monthly so you would notice a change in sounds or speed within days instead of months. Sewers telegraph their failures; the camera just reads the telegram early.
The Decision, Compressed
If your camera shows joint-by-joint root intrusion with decent slope — the heritage clay profile — line it: $80 to $250 per foot, one day, fifty-year design life, every joint sealed. If it shows structural decay, deformation, or you want the slope corrected and the soil cooperates — burst it: $100 to $300 per foot, a new seamless pipe with a century of material life. If it shows a belly, a collapse the camera cannot pass, or a short surgical defect in otherwise-young pipe — excavate that section, or point-repair it, and keep your money for the day the rest of the line earns it.
Whatever the verdict, get it from footage, get it in writing, and get the before/after video as a deliverable. The quotes we write show the method, the footage timestamps that justify it, the per-foot price, the pits, the reinstatements, and the warranty terms — flat-rate, approved before work starts, exactly like every other price on this site. Book the camera first: $250 to $400, the $89 diagnostic credited to any completed work, and a same-week answer to the only question that matters — what is actually under your lawn.
Call 604-615-2212 to book the inspection, or use the form below and a real person — not a call centre — will call you back to talk through what your symptoms suggest before anyone rolls a truck. We answer around the clock, every day of the year, from Vancouver to Chilliwack.
Frequently Asked Questions
Services That Solve This Faster
Drain Cleaning and Camera Inspections
Main-line snaking $280-$650, camera inspections $250-$400, and the footage-first diagnosis every trenchless quote here is built on.
Backwater Valve Installation
$2,500-$5,000 installed, frequently shareable with the same access pits, with municipal cost-share programs to check.
24/7 Emergency Plumbing
Backed-up sewer tonight? Live dispatch at 604-615-2212, flat $150 after-hours premium, triage before the permanent fix is scheduled.
Emergency Plumber Teams by City
City pages with local response bands across all 20 municipalities we serve, Vancouver to Chilliwack.
Related Guides From Our Team
Sewer Camera Inspection: What It Costs in BC — the $250-$400 scope every trenchless decision starts with, and how to read your own footage.
Hydro Jetting vs Snaking: Which You Need — the prep step before lining, and why jetting without camera evidence is malpractice.
Backwater Valves in Vancouver: Costs and Rebates — the November-storm protection that pairs naturally with lateral work.
Sewer Smell in Your House? Find the Source — dried traps, venting problems, and when odour means the lateral needs a camera.
Low Water Pressure: Causes and Real Fixes — the other side of the pipe-forensics family, from PRV valves to galvanized occlusion.

Red Seal certified, licensed gas fitters (BC-PL-2019-4421), $2M insured, 15-plus years on the tools, 12,000-plus jobs across Metro Vancouver since 2010, 5.0 stars from 26 verified Google reviews. We wrote this guide because Metro Vancouver homeowners deserve the numbers, the code references and the honest trade-offs before anyone touches a wrench or a wallet.
More about our team →Book the Camera First — Everything Else Follows
A real diagnosis with footage in your hands: the $89 diagnostic credited to any completed repair, camera inspection $250-$400, and a flat-rate quote that shows the method, the footage timestamps that justify it, and the warranty terms. Emergencies answered 24/7 at 604-615-2212.
Recurring backups or slow drains?
Camera inspections across Metro Vancouver, usually same-week, with the video and depth-marked findings delivered to you. If the line is a trenchless candidate you get a per-foot flat-rate quote with the evidence attached; if it is not, you hear that before anyone sells you anything. Emergency backup tonight? The 24/7 line is answered around the clock.
Call 604-615-2212 WhatsApp Us