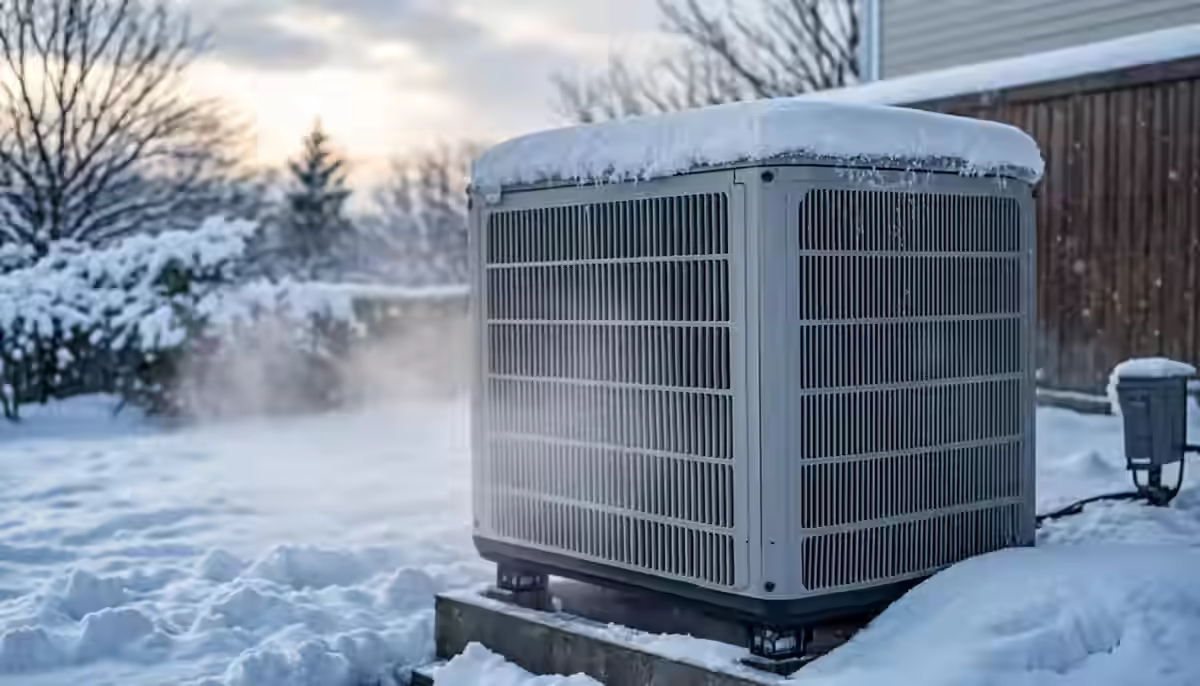
The Honest Answer Up Front
The five rules that decide 90 percent of outdoor unit placement in this province: put the unit high enough that February snow cannot bury the lower coil, roughly 30 centimetres of elevation at the coast and 45-plus in the Fraser Valley; give it the manufacturer's wall clearance, 15 to 60 centimetres, and 60 to 100 centimetres of real service access on one side; make sure defrost meltwater has somewhere to drain that is not the base of the unit itself; keep it far enough from bedroom windows and property lines that the bylaw and your neighbours never learn its name; and never, ever place it where a roofline, downspout or eave can drip water onto it through a freeze-thaw cycle. Do those five and the brand on the badge barely matters, because placement, not equipment, is what separates the heat pump that quietly clears a $16,000-rebate decade from the one that ices up every January and turns its owner into a heat pump sceptic.
Here is the sentence that should frame every placement decision in BC: read the yard in January, not in July. The side yard that looks perfect on a sunny install day, level, tidy, out of sight, may be the drainage sump where three properties' meltwater converge, the drift lane where the north wind fills a metre of snow against the fence, and the amplifier for a 60 dB compressor that now plays into a neighbour's open bedroom window for six months. Placement is decided in one hour on install day and then decides the next fifteen years, which makes it the cheapest engineering in the entire project. The full equipment side of the decision lives on our heat pump services page; this guide is about the yard.
30-45 cm up
Elevation above the snow line, coast to Valley, on stands or a raised pad.
2-10 litres a day
Meltwater a coastal defrost season dumps at the base, which must have somewhere to go.
45-55 dB at night
The property-line noise band most Metro Vancouver bylaws enforce, and placement is how you stay inside it.
The Snow Rules, Zone by Zone
A buried heat pump is a strangled heat pump: snow against the coil blocks the airflow that carries the heat, the unit runs longer to deliver less, the coil ices harder, and the defrost system that should be a five-minute chore becomes a losing war. The elevation answer depends entirely on where in the region your yard sits, because snow depth in Metro Vancouver varies by a factor of three between the coast and the Valley.
| Zone | Typical design snow depth | Honest elevation spec | Notes from the field |
|---|---|---|---|
| Coastal, Vancouver, Burnaby, Richmond, New Westminster | 30-50 cm, melts within days | 30 cm on stands or raised pad | Wet, heavy snow and drifting against fences matter more than depth |
| Fraser Valley, Abbotsford, eastern Maple Ridge, Langley lowlands | 60-100 cm, can persist for weeks | 45 cm plus a snow hood, drift survey of the yard | Outflow winds build drifts against fence lines that double effective depth |
| North Shore and slopes, West Van, North Van, Coquitlam benchlands | 40-80 cm plus drift and slide risk | 45 cm, clear of roofline slide paths | Roof-shed snow is a blade hazard; never site below a metal roof's drop line |
| Delta, Surrey flats, Tsawwassen | 30-60 cm with wind exposure | 30-45 cm, wind-firm anchoring | Open flat lots drift deeply in the first metre against any vertical face |
Two snow truths that catch transplants from Ontario and Alberta off guard. First, coastal snow is wet: it does not blow through the coil like prairie powder, it slumps against the unit, melts slightly, refreezes at night into a crust, and starts the ice-bowl problem even when total depth looks unimpressive. Second, BC drifts are predictable if you read the yard: snow drops out of the wind in the lee of fences, hedges and wall corners, and those calm pockets are exactly where people like to tuck equipment out of sight. Walk your property after the first real snowfall and note where the drifts form; that single observation is worth more than any elevation chart, and it is the same discipline our Abbotsford heat pump crews apply when they spec 45 centimetres plus a hood without being asked twice.
And the maintenance reality that placement either enables or prevents: snow needs brushing off the unit top after every significant fall, by hand or soft broom, two minutes of cold work. A unit placed where the homeowner can actually reach it, and see it from the back door, gets that two minutes. A unit hidden behind the shed gets a shovel in March and a service call about bent fins. Visibility is a placement feature, not a bug.
Drainage: The Ice-Bowl Problem
Every defrost cycle dumps meltwater at the base of the unit, a few litres at a time, dozens of times a week through a coastal winter, and that water obeys exactly one law: it flows to the low spot and freezes there overnight. If the low spot is the unit's own base, the pad becomes a bowl, the bowl becomes an ice block, the fan blade rings against the ice, and eventually the blade or the motor loses. The failure sequence is so common it has a name in the trade: the ice bowl. The prevention is almost embarrassingly cheap: a level pad on a compacted gravel bed, the surrounding grade sloping away, and meltwater routed somewhere that is not under the unit.
The rules, in order of how often we see them broken. The pad must be level, because a pad settling on one corner tips the unit and its drainage toward its own base. The base should be gravel or crushed rock, not sealed concrete in a saucer, so meltwater can leave vertically. Downspouts and hose bibs discharge at least a metre away, ideally two, because a downspout aimed at the pad is a February ice-maker with a municipal water supply. And on the truly poor-draining sites, Richmond and Delta clay, anywhere with a high winter water table, a small French drain or a gravel trench to daylight is the honest fix, $300 to $900, versus the fan-motor replacement that eventually bills $250 to $450 plus the after-hours premium when the ice takes it out on a Sunday night.
The best fifty dollars in heat pump placement is the gravel under the pad. I have replaced fan motors cut by ice rings that formed because a unit sat on a beautiful, perfectly level, utterly sealed concrete pad that held water like a birdbath. Grade it, drain it, forget about it for fifteen years.
One more drainage villain specific to this region: the freeze-thaw cycle itself. The coast spends weeks hovering around zero, which means daytime melt and night ice, repeatedly, and any water path that works at 2 p.m. can be a skating rink by 3 a.m. That is why we like to see the meltwater path and the snowmelt path leave the pad zone immediately, not pool within a metre of it. Our winter prep guide covers the October drainage check for the whole property, and the heat pump pad is item one on it.
Noise, Bylaws and the Strata Conversation
Modern inverter heat pumps run 55 to 65 dB(A) at one metre, conversation level, and typically 45 to 50 dB at a property line, which lands inside what most Metro Vancouver municipal noise bylaws allow in residential zones, roughly 55 to 70 dB daytime and 45 to 55 dB at night measured at the line. The bylaw numbers matter, but the practical numbers matter more, because bylaw enforcement is a last resort and neighbour relationships are a daily reality. Three placement moves do most of the work: point the loudest face, usually the fan discharge, away from bedroom windows, yours and theirs; put a solid fence, hedge or wall between the unit and the nearest window as a sound break; and isolate the unit from the structure with anti-vibration mounts if it sits on a deck or a wall bracket, because structure-borne hum travels through framing in ways that air noise never does.
Strata deserves its own paragraph because it is where heat pump plans most often stall. Under BC's Strata Property Act, alterations to common property, and an exterior wall or a common yard is common property, require written approval before the work, and the request that gets approved is the one that arrives with the unit's spec sheet, the manufacturer's dB ratings at 1 metre and at 3, the exact pad location on a site plan, and the installer's name and licence number. Requests that arrive as "we are putting in a heat pump next month" get deferred, and deferred again. Our advice to strata owners is documented everything, volunteer the noise spec before it is asked for, and if the council is nervous, offer the location alternative with the greater setback. The Vancouver heat pump guide covers the equipment half of the noise story; placement is this chapter's half, and together they are the difference between a quiet winter and a dispute file.
The honest placement trick that costs nothing: stand where the unit will go, at 10 p.m., in the season you are least looking forward to, and listen. If you can hear your own bedroom through the wall you are about to bolt a compressor beside, so can the neighbour whose window is closer. Sound is a January problem that is decided in July, which is the placement theme of this entire guide.
The Clearance Table
Every number below is a number someone has regretted learning after the concrete cured. Manufacturer specs vary by model, so the spec sheet for your specific unit overrides the general column, but the reasons do not change.
| Clearance from | Honest number | Why the number exists |
|---|---|---|
| Wall behind the unit | 15-60 cm per manufacturer | Recirculation of discharge air crashes capacity and ices the coil |
| Service side, one full side | 60-100 cm clear | Fan motors, coils and valves come out sideways, or they do not come out |
| Fence or hedge | 60 cm, and any screen must be at least 60% open above the coil line | A solid screen makes the unit breathe its own cold exhaust |
| Dryer vent or kitchen exhaust | 3 m, and never in the discharge plume | Lint and grease load the coil like a filter that never gets changed |
| Gas meter and regulator | 1 m per FortisBC clearance practice | Regulator vents must not sit in a plume of condensing, freezing discharge air |
| Property line | Per municipal bylaw, commonly 1-3 m for mechanical equipment | Bylaw enforcement is rare until it is not, and retrofit moves cost more than the original siting |
| Bedroom windows, yours or theirs | 3 m plus a sound break where possible | Night-mode noise is the number one heat pump complaint in dense neighbourhoods |
| Unguttered eave or roofline | Outside the drip line entirely | Freeze-thaw drip glazes the coil and the pad into a single ice mass |
Where Not to Put It: The Blocklist
Every item on this list was a real install we were called to rescue. The unit under the un-guttered eave, iced into the fascia by January. The unit tucked into the carport corner between two walls, quietly recirculating its own exhaust until it ran all night to hold 19 degrees. The unit in the sprinkler-hit planter bed, its coil furred like a kettle. The unit on the pad in the low corner where three yards drain. The bracket installation outside the neighbour's bedroom window that turned two friendly households into a bylaw dispute. The side yard so narrow the fan motor could not come out without cutting the fence. Every one of these was chosen for tidiness or line-set convenience, and every one cost more to fix than it would have cost to place correctly the first afternoon.
The pattern on the blocklist is that bad placement decisions are always reasonable decisions made with incomplete information: the eave looks like shelter rather than a drip line, the carport looks like cover rather than an airflow trap, the low corner looks tidy rather than wet, the closest wall looks cheap for line set rather than loud for the neighbour. Which is why the answer is not talent, it is the yard walk, the checklist, the questions from Chapter 9. Placement is the one hour of the install where the homeowner's local knowledge, where the drifts form, where the downspouts dump, which window is whose bedroom, is genuinely better information than anything on a plan, and the honest contractor asks for it.
Retrofits in the Dense Cities
Placement theory meets its match on a 33-foot Vancouver lot, where the side yards run a metre and change, the neighbour's window is closer than your own, and every square metre of the yard already has a job. The tools that make it work: slim-footprint units whose discharge clears narrow side yards; wall brackets that lift the unit above the snow line and out of the side-yard drainage path, with isolation mounts because the bracket is attached to your shared wall; and the longest, least glamorous tool, which is the conversation with the neighbour before the crane arrives. On corner lots and in duplex zones, the property-line setback column of the clearance table is the one to check twice, because the bylaw office measures differently after a complaint than before one.
Townhouses and laneway homes run on strata approvals and compact geometry: the pad location usually comes down to two candidates, and the honest estimator presents both with the noise and drainage trade-offs written out rather than picking the one with the shorter line set. Richmond and Delta flats add the high water table, which pushes every pad onto raised gravel rather than grade-level concrete, and the North Shore adds slope, which makes level pads a small excavation project and makes roof-shed snow a real hazard the clearance table already warned about. New-build semis and infills in Surrey and Langley are the easiest placements in the region because the location can be planned at design stage with the builder, and the mistake we most often see is inheriting the developer's "wherever" pad position that nobody checked against the winter sun or the prevailing outflow wind. Our Vancouver heat pump crews do the small-lot version of this weekly; every city in our service area has its own version of the same puzzle.
What Good Placement Adds to the Invoice
Honest adders, Lower Mainland, 2026. Not every site needs every line, and the site assessment decides the list; final pricing is confirmed in writing before any work starts. Read the right-hand column as the repair bill each item prevents.
| Item | Cost | What it prevents |
|---|---|---|
| Composite or concrete pad, level, on compacted gravel | $200-450 | Settling, tipping, the ice bowl, premature line-set stress |
| Raised stand or wall brackets, 30-45 cm | $300-600 | Buried coil, corrosion from ground moisture, snow-line capacity loss |
| Manufacturer-approved snow hood | $150-400 | Snow loading on the fan, roof-shed ice strikes, coil glazing |
| Anti-vibration isolators, pads or spring mounts | $50-150 | Structure-borne hum, the neighbour complaint, the strata escalation |
| Gravel bed or French drain to daylight | $300-900 on poor sites | The ice bowl, fan-blade strikes, pad heave, the 11 p.m. ice-locked call |
| Sound blanket or acoustic screen, open-louvered | $100-300 | The marginal property-line reading, the dispute that costs a friendship |
| Relocation of an existing badly placed unit | $800-2,000 including line set and electrical | All of the above, purchased after the fact, which is the expensive way |
Read the last line twice, because it is the economics of this entire guide: relocating a badly placed unit costs roughly two to four times what placing it well would have cost on day one, before counting the repairs the bad placement caused in the meantime. The $500 of stands, gravel and isolators that feel like nickel-and-diming on the quote are the cheapest insurance in the project, and the base install itself, $6,500 to $14,000 for whole-home systems, $3,800 to $5,500 for single-zone ductless, is where the rebate stack up to $16,000 on qualifying cold-climate units does its work. The adders are not discountable extras; they are the difference between the rebate unit and the regret unit.
The Yard Walk: One Hour That Decides Fifteen Years
Before any quote, ours or anyone's, there should be a walk, and this is the list we work from, because it converts a placement opinion into a placement decision. Read the yard with winter eyes: where does the snow drift, where does the water stand after a January rain, where do the eaves drip on the one night a week it freezes. Read it with summer eyes: where does the sun load the unit, because a unit roasting against a west-facing wall loses efficiency and life, and where does the neighbour's bedroom sit in relation to every candidate pad. Read it with service eyes: can a technician with tools and a coil comb reach the service side without dismantling a fence, and where does the condensate and meltwater actually go? And read it with bylaw eyes: property lines, setbacks, gas meter, and strata boundaries in townhouse complexes where the pad location may sit on common property you do not own.
The walk usually produces two viable locations and one obviously wrong one, and the choice between the two is where the homeowner's input genuinely matters: which window is whose bedroom, which view is sacred, which corner floods. That conversation is the difference between an install and a good install, and a contractor who skips it, who quotes from a satellite image and a floor plan, is a contractor who will hand you the bill for Chapter 8's last line eventually. The questions that vet any placement, ours included, live in our contractor selection guide, and the single most useful one is the simplest: show me where the water goes in January.
Homeowners ask me which unit is the most reliable, and my honest answer after fifteen years is: the one with two feet of gravel under it, forty centimetres of air under that, and a neighbour who never learned its name. That placement beats every brand on the market.
The Placement Card, In Summary
The whole guide, compressed to the card to hold while you stand in the yard:
| Question | The honest answer |
|---|---|
| How high? | 30 cm at the coast, 45 cm plus a hood in the Valley, always above the drift line you observed yourself |
| Where does the water go? | Level pad, gravel base, grade falling away, downspouts redirected, French drain if the site is clay |
| How close to the house? | Manufacturer's 15-60 cm, with 60-100 cm of service access on one side, forever |
| Will the neighbours hear it? | Not if the discharge faces away from windows, a fence breaks the line, and isolators kill the hum, 45-55 dB night limits respected |
| Strata? | Written approval with spec sheet, dB ratings, site plan and installer licence attached, before anything is ordered |
| Under the eave? | Outside the drip line entirely, or under a proper gutter with the hood as backup, never in the ice-curtain path |
| What does right placement cost? | $200-900 in adders on most sites, $800-2,000 to relocate after the fact, and the January it prevents is not for sale |
Placement is the least glamorous chapter of a heat pump install and the one with the longest consequences: the unit you never think about, on the pad that never ices, at the height the snow never reaches, at the distance the bylaw and the neighbour never measure. It is one afternoon of attention in exchange for a quiet decade, and it is entirely, boringly worth it.
Get a Yard Walk Before You Get a Pad
A free estimate includes the full placement assessment, snow lines, drainage paths, drip lines, bylaw and strata clearances, and a written siting plan with the honest adders priced. Zero obligation, and repairs for existing units run $180-450 with the $89 diagnostic credited, 24/7.
Frequently Asked Questions
Services From This Guide
Red Seal crews and flat-rate pricing across all twelve Metro Vancouver cities we serve, from Vancouver, Burnaby and Richmond through Surrey, Langley and Delta out to Abbotsford, Maple Ridge and the North Shore.
Heat Pump Services
Installs $6,500-14,000 with placement plans included, rebates to $16,000.
Heat Pumps in Vancouver
Small-lot siting done right, from Kits to Killarney.
Heat Pumps in Abbotsford
Valley snow depths, valley placement rules.
24/7 Emergency Repair
$150 flat after-hours premium, $89 diagnostic credited.
Related Guides
Heat Pumps in Vancouver: The Honest Guide
The system this guide places: sizing, costs, coastal duty.
WinterWinter Prep for Vancouver Homes
The October list, of which placement is the first item.
AdviceHow to Choose an HVAC Contractor
The questions that expose a contractor who never read your yard.

Half the winter service calls we run are placement problems wearing a refrigeration costume: a unit at grade in a Valley snowbank, a pad holding a lake, a bracket bolted outside a neighbour's bedroom window. We wrote this guide because placement is decided in one hour on install day and then decides the next fifteen years, and it deserves better than wherever the longest line set happens to reach. To book instead of DIY, see heat pump repair in Delta — same-day across the city.
More about our team →Get a Placement Plan, Not Just a Pad
A free estimate includes a full yard walk: snow lines, drainage paths, drip lines, bylaw and strata clearances, and a written placement plan with the honest adders priced. Zero obligation, and we will tell you when the cheaper location is the better one. If you would rather hand this to a pro, our heat pump services pages cover Metro Vancouver.
Unit iced in tonight?
Emergency calls are answered 24/7 with live dispatch and a flat $150 after-hours premium posted in advance. The $89 diagnostic is credited to any repair, and most heat pump repairs run $180 to $450.
Call 604-615-2212 WhatsApp Us