The Honest Answer Up Front
In most of North America, attic ventilation is sold on heat: cool the attic, shrink the summer bill. In Metro Vancouver, that pitch is backwards. Our attic problems are 80 percent moisture and 20 percent heat, because a coastal winter is long, mild and wet, and because the average family pushes 10 to 15 litres of water vapour a day into their indoor air, where the warmest, dampest fraction of it floats upward and finds every unsealed penetration in the ceiling plane. What happens next, frost on the roof deck, soaked insulation, mold spots on sheathing, spring drips that look like roof leaks, is decided by three things in order: how airtight your ceiling is, how balanced your venting is, and whether your bath fans actually reach outdoors.
The second honest headline: the hardware matters less than the balance. A continuous ridge vent fed by clear soffits is the default best answer on most roofs, box vents are a fine budget alternative, turbines are moving parts this climate does not reward, and powered attic fans, the most-sold, least-understood product in the category, usually create the problems they promise to solve, because they pull from the easiest source available, and the easiest source is your living room. Chapter 5 gives them a fair trial and a mostly negative verdict.
The third headline is the order of operations, because it decides whether any of this money is well spent: seal the ceiling plane first, fix the bath fan ducting second, clear and balance the ventilation third, add insulation fourth, and only then consider a fan, if ever. This guide walks each step with the numbers, the code rule of thumb, and honest Metro Vancouver pricing, with final figures confirmed in writing after an on-site look, because attics vary more than any other part of a house. For where attic work sits among the region's other upgrades, the energy-efficient upgrades guide ranks the ROI, and the cooling page covers the equipment side of the upstairs heat problem.
1:0 rule
One square foot of net free vent area per 300 of attic floor, split between low intake and high exhaust. Balance beats total.
0 a day
Household moisture a family of four generates daily in winter. Where it ends up decides your attic's fate.
0 July attic
Peak attic temperature on a 25-degree Metro Vancouver afternoon. Ventilation plus insulation keeps it off your bedroom ceiling.
How an Attic Actually Breathes
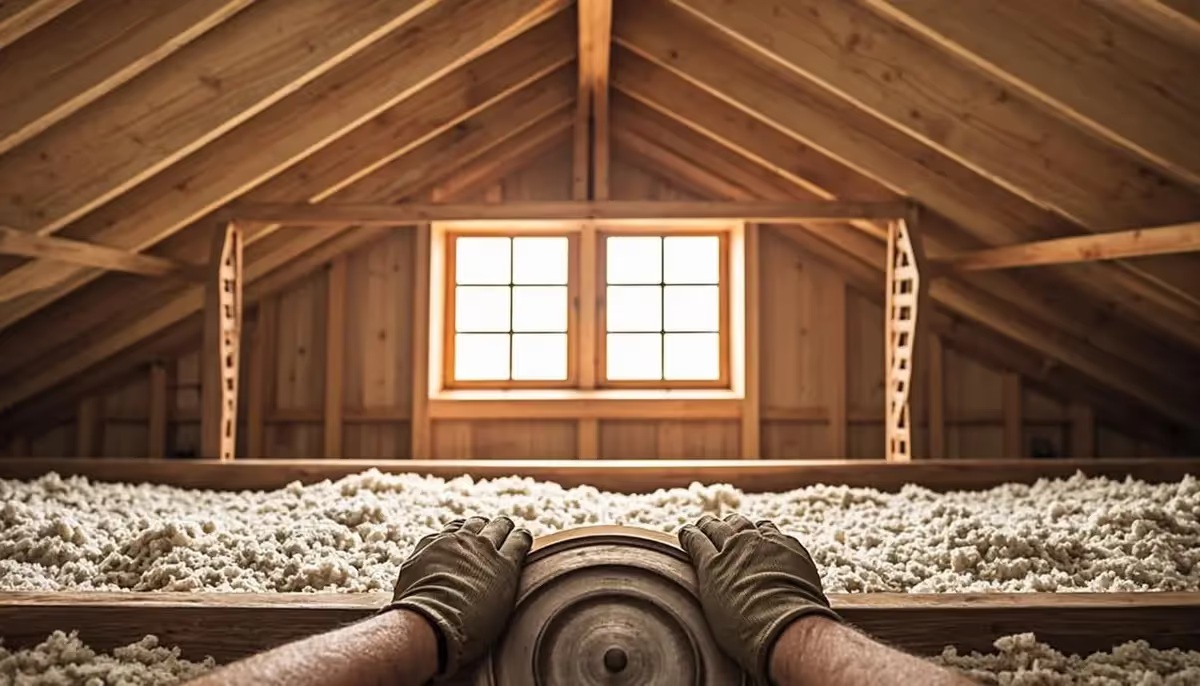
No fan, no moving parts: a ventilated attic runs on buoyancy. Attic air warms through the roof on a sunny afternoon, warm air rises, and it exits through whatever high openings exist, ridge vents, gable vents, box vents near the peak. The air it takes with it is replaced by cooler air entering low, at the soffit vents under the eaves, and the loop turns all day without costing a watt. In winter the loop weakens but keeps working, and its job changes: instead of dumping heat, it is sweeping out the moisture that drifted up through the ceiling.
The critical component is the one homeowners never see: the baffle, a plastic or foam channel stapled inside each rafter bay between the soffit and the attic floor. Without baffles, the insulation blown or laid over the top plate slides down and blocks the soffit, and the attic's lungs stop working from the bottom up. Half the older homes we assess in New Westminster, Burnaby and East Vancouver have soffit vents that are painted over, buried, or blocked by forty years of settled insulation, which means their exhaust vents, however handsome from the street, are decorative.
Two regional notes before the detail chapters. First, wind washing: on exposed sites, North Shore slopes, Tsawwassen flats, high-rise-adjacent rooftops, strong wind forcing through vents can push cold or damp air through the insulation's top layer, and dense-packed edges or wind baffles manage it. Second, the stack effect of the house below: warm air rises through a two-storey home and exits via the top-of-house leaks, and the attic is the last room on the way out. The attic does not create the moisture problem; it inherits it. That is why Chapter 8, the ceiling plane, is the most important chapter in this guide.
The Moisture Ledger: Where the Water Comes From
Every BC attic conversation starts with the same accounting. A household of four puts roughly 10 to 15 litres of water into the indoor air every day, and the table below is the honest ledger of where it comes from. Indoors, at 21 degrees and 40 percent relative humidity, that moisture is an invisible gas. But drive it upward through ceiling gaps into an attic sitting at -2 degrees on a January night, and physics cashes it out: the air cools, its carrying capacity collapses, and the water lands as frost on the first cold surface it meets, which is why nail tips, the coldest steel in the attic, wear white caps all winter.
| Moisture source | Daily contribution | Attic risk if it leaks up |
|---|---|---|
| Breathing and perspiration, 4 people | 2-3 litres | Slow, steady background load; ceiling leaks deliver it |
| Showers and bathing | 1-2 litres | High if a bath fan dumps into the attic instead of outdoors |
| Cooking, kettle to pasta night | 1-2 litres | Moderate; range hoods ducted outside remove most of it |
| Laundry, houseplants, pets | 2-3 litres | Background load; dryers vented indoors are the outlier sin |
| Wet basements and crawlspaces | 1-5 litres | Rises through the whole house; an attic symptom with a basement cause |
The severity scale we see from the ladder: frost only on nail tips during a cold snap is normal and harmless. Frost patches the size of dinner plates on the sheathing mean measurable leakage and deserve a ceiling-plane inspection. Frost everywhere, streaks of grey mold following the rafters, or drip marks on the insulation means the ledger has been running in the red for years, and the fix list starts with air sealing and ends with a dehumidification conversation, not with more roof vents. The autumn timeline for catching it is in our winter prep guide, because the best night to inspect a Lower Mainland attic is the first clear cold snap of December.
The Passive Options, Compared Honestly
Passive venting is the category that works in this climate, because it has no motor to fail, no thermostat to stick, and no electricity bill to feed, and because a balanced passive system moves the right amount of air on both the July afternoon and the January night. The four options, with the honest Metro Vancouver verdict on each:
| Option | How it works | The BC verdict |
|---|---|---|
| Continuous ridge vent | Slot cut along the peak, covered by a shingle-over filter vent; exhausts along the entire ridge line | Best default. Even draw, zero maintenance, cheapest when added during a re-roof. Needs matched soffit intake. |
| Box (turtle) vents | Individual screened vents near the peak, typically 50-60 sq in net free area each | Solid budget option; needs several units and a watertight flashing job each. $150-350 installed per vent. |
| Turbine vents | Wind-spun turbine heads near the ridge, moving air mechanically with the breeze | Moving parts in a wet climate; bearings seize, and exposed sites ingest driven rain. Rarely our recommendation. |
| Gable vents | Screened openings high on the gable end walls | Useful cross-flow on gable roofs with no ridge option; do not combine on the same slope as a ridge vent. |
Two combinations to avoid, because they short-circuit the system. Ridge vent plus box vents on the same roof slope turns the highest box vents into intake for the ridge, and the soffits stop contributing, so the lower sheathing sits in stagnant damp air. Gable vent plus ridge vent does the same on a smaller scale. One high exhaust strategy per roof, matched soffit intake below it, baffles keeping every bay open: that is the whole passive design, and it has not needed improvement since it was invented.
Powered Attic Fans: The Honest Record
The pitch is seductive: a thermostatic fan in the roof, 1,200 to 1,600 CFM, $450-900 installed, cutting attic temperatures and therefore cooling bills. The record, in the homes we get called to, is uglier. A powered fan is a machine that moves air from wherever it can find it, and if the soffits are blocked, buried or painted shut, the easiest air to find is the conditioned air leaking upward through your own ceiling. The fan cools the attic by air-conditioning it with your living room, which is why several North American field studies have measured household cooling energy going up after powered attic fan installs, not down.
An attic fan without intake does not ventilate the attic. It ventilates your living room through the ceiling, and bills you for the privilege on two meters: the fan's, and the air conditioner's.
The failure mode nobody prices in is the dangerous one. A strong exhaust fan depressurizes the house relative to its surroundings, and any natural-draft appliance, an older gas water heater or an aging furnace with a conventional flue, responds to depressurization by spilling combustion products backward into the basement instead of drafting up the chimney. That is a carbon monoxide scenario, not a comfort scenario, and it is why we treat powered attic fan quotes on homes with natural-draft equipment as a safety review first and a ventilation proposal second.
The fair defence: powered fans earn their keep in specific cases, large, well-sealed attics with matched intake where passive options cannot fit, flat-roof sections with no ridge, and a few cathedral-ceiling retrofits. Solar-powered versions trade CFM for wiring simplicity, running on the days they are needed most, at roughly half the airflow of their hard-wired cousins. If a fan is genuinely the right answer, it goes in after the ceiling plane is sealed and the intake is verified, never before, and never as a first move. In fifteen years and twelve thousand jobs, that sequencing rule has never once been wrong.
The Sizing Math, Worked for a Real House
The rule is 1 square foot of net free vent area per 150 square feet of attic floor with no vapour barrier at the ceiling, improving to 1:300 where a vapour barrier exists, which most homes built or insulated since the 1970s have, even if the barrier is the poly sheet your grandfather stapled with a hammer tacker. Here is the arithmetic for a 1,600 square foot rancher in Surrey, the region's most common attic shape:
1,600 divided by 300 equals 5.3 square feet of net free area in total. Split it low-high, and slightly favouring intake is the current best practice, say 55 percent intake and 45 percent exhaust: 2.9 square feet at the soffits, 2.4 square feet at the ridge. A continuous ridge vent delivers roughly 13 to 18 square inches of net free area per linear foot, so 2.4 square feet, about 345 square inches, is 20 to 26 linear feet of ridge, which is about the full ridge of this house, and that is not a coincidence: ridge vents and typical roof lengths were made for each other. On the intake side, a standard perforated aluminum soffit panel contributes roughly 5 to 9 square inches per foot, so two 24-foot eaves with clean panels and baffles deliver the intake side comfortably.
Two practical cautions with the math. Net free area is the manufacturer's rated figure for airflow through the vent, not the size of the hole, and the ratings vary wildly between products, from under 10 square inches for a cheap perforated circle to 18-plus for a good ridge vent, so the parts list is chosen from spec sheets, not eyeballed. And insulation that has slid over the top plates, or decades of paint over perforated soffits, quietly deletes the intake side of the ledger, which is why every assessment we run includes a look up the baffle channels before anyone praises or blames the exhaust hardware. If your house has two layers of shingles and one gable vent from 1962, the math above is the size of the conversation, and the assessment visit, booked through our Vancouver HVAC page or any of our city pages, is where it gets applied to your actual roofline.
The Signs Your Attic Is Failing
Attics fail out of sight, but they write notes you can read from inside the house and from the street. This is the symptom table our techs compiled, sorted by the season each sign shows up:
| The sign | Season it appears | What it means |
|---|---|---|
| Frost on nail tips and roof deck | Deep winter | Moisture leaking up through the ceiling plane; seal first, vent second |
| Grey mold spots following rafters | Any month, worst by spring | Years of repeated wetting; sheathing is being digested |
| Musty smell in upstairs rooms | Damp months | Wet insulation above; the attic is breathing into the house |
| Ice dams at the eaves, icicles on the gutters | Cold snaps after snow | Heat leaking into the attic melting snow that refreezes at the cold edge |
| Upstairs 5 degrees warmer than downstairs every July afternoon | Summer | Attic heat radiating through thin or compromised ceiling insulation |
| Curling, cupped shingles at 12-15 years | Year-round, visible from the street | Chronic overheating from the underside; a roof cooking itself |
| Damp patches on the ceiling after the first cold snap | Autumn to winter | Frost melting off the deck and dripping, often misdiagnosed as a roof leak |
The ice-dam row deserves its own sentence in this region, because North Shore and North Vancouver roofs see the worst of it: dams are a heat problem, not a roof problem, and the fix is ceiling sealing plus insulation, with venting as the supporting actor. A roofer can install edge vents and ice-and-water shield until the cows come home, and the dam rebuilds every January until the heat stops reaching the attic. That is also why our heat dome guide and this one keep pointing at the same ceiling plane from opposite seasons.
The Ceiling Plane: The Chapter That Saves the Money
The most important surface in your house is one you have never seen: the top of your ceiling, the plane where drywall, pot lights, speaker wires, vent stacks and the attic hatch all meet the insulation. Every square centimetre of it is a border crossing between warm humid house air and cold dry attic air, and the default condition of that border in older Metro Vancouver homes is a sieve. The 1990s pot light, the unsealed poly around the bath fan, the attic hatch that closes on nothing but a piece of drywall, the chimney chase open at the top: each one is a chimney for the moisture ledger in Chapter 3.
Sealing that plane is unglamorous, inexpensive relative to everything else in this guide, and the highest-return attic work there is. The parts list is short: foam gaskets and covers for pot lights, weatherstrip and an insulated cover for the hatch, caulk and foam for top plates and wire penetrations, and proper ducting for the bath fans, terminated outdoors with a damper. Bath fans get their own sentence because they are the region's most common attic crime: a fan rated to move 80 CFM of steam, dumping that steam directly into insulation that was never asked to be a dehumidifier. Re-ducting one to the exterior runs $180-450, and it is the single fix we recommend most often from the top of the ladder.
The principle that organizes all of it, and the sentence to bring to any contractor conversation: air seal first, insulate second, ventilate third. Insulation laid over a leaky plane filters the escaping air and does a bad job of it; ventilation added to a leaky plane sweeps away more of your heated air than your moisture. The sequence is not a preference, it is physics with a budget attached, and the energy upgrades guide runs the ROI numbers for the whole envelope in the BC context.
Vented Versus Unvented: The Spray-Foam Question
Every attic conversation eventually meets the alternative: close the attic into the conditioned envelope by spraying foam under the roof deck, eliminate the venting entirely, and turn the attic into semi-conditioned space. Done properly, unvented conditioned attics are legitimate building science, recognized in the codes, and they are the right answer for specific problems: cathedral ceilings with no room for ventilation channels, attics containing HVAC equipment and ductwork, and conversions where the attic is becoming living space. The ductwork point matters more every year, because a ducted heat pump or air handler sitting in a 55-degree attic wastes capacity through every seam, and moving the equipment inside the envelope buys it back.
The honest costs and cautions for this region: closed-cell foam under a roof deck is a significant project, priced by the board foot, with whole-roofline jobs often running well into five figures, and it is effectively permanent, the next roof replacement happens over it, the next rewiring happens through it. Fire code requires thermal or ignition barriers over exposed foam in living spaces, and the moisture dynamics change rather than disappear: a conditioned attic moves the vapour-control conversation from the ceiling plane to the roof deck, and a sloppy foam job on a coastal roof can hide a leak until the sheathing is soft. For the region's typical gable attics over insulation, the vented approach, sealed, baffled and balanced, remains the default, and we recommend foam roofs only when the building's geometry or equipment genuinely demands it.
If your attic holds the furnace or ducts and the upstairs rooms never hold temperature, the equipment-in-the-attic question is worth asking during an assessment, because sometimes the right answer is a ductless conversion that removes the attic from the airflow entirely. The BC Building Code's Part 9 requirements for roof spaces and the CleanBC rebate paths for envelope work both reward getting this decision right the first time, and both are on the table during our assessment visit.
What the Work Costs, In Order of Value
Attic pricing varies with access, roof pitch and how much insulation is in the way, so treat these as the honest ranges we quote from, with final pricing confirmed in writing after on-site assessment. The order below is the value ranking, most return per dollar first:
| Work | Typical Metro Vancouver price | Why it ranks here |
|---|---|---|
| Bath fan re-duct to exterior | $180-450 | Deletes the largest single moisture injection in most homes |
| Attic hatch seal + insulated cover | $150-300 | The biggest hole in the ceiling plane, closed for the price of dinner out |
| Soffit clearing + baffle install | $300-600 | Restores the intake side; unlocks the value of exhaust you already own |
| Box vents, installed | $150-350 each | Budget exhaust where ridge venting does not fit the roof |
| Ridge vent (during re-roof) | Cheapest as part of the roofing contract | Best exhaust option; coordinate with the roofer, we supply the vent math |
| Powered attic fan, installed | $450-900 | Last resort only, after sealing and intake, never with natural-draft appliances |
| Insulation top-up | $1.50-2.50 per sq ft | After sealing; the comfort and ice-dam payoff, R-49 and up target |
One coordination note that saves people real money: ridge venting costs a fraction when the roofers are already there, so if your shingles are within a few years of replacement, the sequence is assessment now, sealing and bath-fan work now, and the vent upgrade timed to the re-roof. We work alongside the region's roofing crews regularly and will hand them the vent plan with the numbers from Chapter 6 so the vent choice is not improvised on ladder day.
Doing It in the Right Order
Everything in ten chapters compresses to a sequence, and the sequence is the difference between an attic that behaves for thirty years and a collection of expensive hardware that changed nothing:
Assess in the right season
The first clear cold snap of December shows every moisture fault as frost. Summer shows the heat faults. A good assessment photographs both seasons' evidence.
Seal the ceiling plane
Hatch, pot lights, top plates, wire holes. Cheap, invisible, and the step every skipped-vent-warranty story starts without.
Fix the bath fans
Duct them outdoors with dampers, sized to the room, and verify flow with the tissue test. $180-450 and the attic's worst enemy leaves the building.
Restore and balance the venting
Baffles and soffits first, then one exhaust strategy, sized by the 1:300 math, ridge preferred, box vents acceptable, turbines politely declined.
Insulate to target, fan last if ever
Top up to R-49 and up after the plane is sealed. A powered fan is the final option, only on sealed homes with verified intake and no natural-draft appliances.
That is the whole discipline, and it is why our assessment visit ends with a priority list rather than a product pitch. Attics reward sequence and punish improvisation, and in a climate that hands the same roof eight months of rain, a cold snap and a heat dome in a single year, the punishment arrives on schedule. The free estimate walks your attic with a camera, a moisture meter and the vent math, and you keep the photos either way.
Book an Attic Assessment Before the Wet Season
A Red Seal tech checks the ceiling plane, bath fan ducting, vent balance and insulation, photographs everything above your ceiling, and hands you a written plan in honest priority order: seal, duct, vent, insulate, and only then consider the fan. Zero obligation, and the photos are yours to keep.
Frequently Asked Questions
Services From This Guide
Red Seal crews from our Surrey base cover Vancouver, Burnaby, Richmond, Surrey, Langley, Coquitlam, Delta, New Westminster, North Vancouver, Maple Ridge, Port Coquitlam and Abbotsford.
HVAC in Vancouver
Ventilation, heating and cooling service for the city's older housing stock.
HVAC in Langley
Attic and ventilation work across Langley, from Willowbrook to Aldergrove.
Cooling & AC service
Repairs $180-450, installs from $3,800, and the $89 diagnostic credited.
Heating service
Furnace and heat pump care from the same Red Seal crews, $149-250 maintenance.
Related Guides
Energy-Efficient Upgrades That Pay Off in BC
Where attic work sits in the ROI ranking against windows and heat pumps.
WinterVancouver Winter Prep: The Complete Home Checklist
The autumn list that includes your attic, hatch and bath fans.
CoolingHeat Dome 2026: Is Your Home Ready?
Why the upstairs bakes: attic heat and the fixes that matter.

Our techs spend more time in attics than in any other part of the house, and the findings repeat with regional precision: bath fans dumping into insulation, frost painted across the sheathing, and hatches that leak like open windows. This guide is the assessment we give at the top of the ladder, written down, with the vent math and the honest verdicts on powered fans that our crews deliver across twelve Metro Vancouver cities. To book instead of DIY, see furnace maintenance in Surrey — same-day across the city.
More about our team →Book an Attic Assessment Before the Wet Season
A Red Seal tech checks the ceiling plane, bath fan ducting, vent balance and insulation, photographs what is happening above your ceiling, and hands you the findings with a written plan in honest priority order. Zero obligation. If you would rather hand this to a pro, our heating & furnace services pages cover Metro Vancouver.
Water where it should not be?
Active leaks, overflowing condensate or a flooded ceiling get 24/7 dispatch with a flat $150 after-hours premium posted in advance. If it is a plumbing leak rather than attic condensation, the $89 diagnostic is credited to the repair.
Call 604-615-2212 WhatsApp Us