
The Honest Answer Up Front
A window is a manufactured product tested in a laboratory wall, and an installation is everything that happens between that test and your bedroom. The label numbers assume the unit sits plumb, sealed, drained and insulated in the opening, and every one of those conditions is created by hands on install day. A mid-tier window installed superbly outperforms a premium window installed carelessly, year after year, which is why the quality of the install is the half of the purchase the brochure never shows.
The good news is that installation quality is verifiable, in the moment and for weeks afterward, by any homeowner willing to look at eight specific things. They are not secrets and they are not subjective: each check has a good state and a red flag, and together they cover the two failure paths that ruin window jobs, water and air. This guide walks all eight, then goes deeper on the three that matter most, shimming, flashing and sealing, and finishes with the first-year symptoms that catch what install day missed.
Our own crews are held to this list with a 2-year workmanship warranty behind it, and the windows and doors replacement page covers how the install standard is priced into every quote we write, flat-rate, before work begins.
The glass is the promise, the install is the delivery. Verify the eight, and the label performance you paid for actually arrives.
0 jobs since 2010
Plumbing, heating and window jobs completed by our Red Seal team across Metro Vancouver.
0 star rated, 26 reviews
Homeowners rating the estimates flat, the schedules honest and the installs exactly as quoted.
0 in the field
A 2010 start in Vancouver trades means every old-house wall condition is a familiar one.
0 workmanship warranty
Glass and hardware carry manufacturer coverage, and our own labour is guaranteed for two full years.
The Eight Things to Verify
Here is the whole standard in one table, written so you can check it yourself with a level, a flashlight and ten minutes per window. Any crew doing the work right will happily walk you through every row, because none of it is news to them, and a crew that bristles at the questions has answered a different question than you asked. The same checklist protects a picture unit at $650 to $950 installed and a whole-home package at $12,000 to $30,000, because physics does not scale the two failure paths away.
| The check | What good looks like | The red flag |
|---|---|---|
| 1. Plumb, level and square, shimmed | Shims at hinge and lock points, frame true in both planes, even reveal margins all around | Sash drifts closed or open on its own, rubbing at a corner, visibly uneven reveals |
| 2. Nailing fin and weather barrier integration | The fin layered with the wall's water-shedding membrane so water exits down and out | Fin stapled flat over housewrap, or tape over foam that reverses the drainage order |
| 3. Sill pan and flashing tape order | Sill pan first and widest, then jambs, then head last, each layer shedding onto the one below | Head tape lapped over jamb tape at the corners, a funnel instead of a roof |
| 4. Backer rod and perimeter sealant | A tooled joint over backer rod, flexible and continuous, at the exterior perimeter | Gaps stuffed with foam and called sealed, or sealant bonded to nothing behind it |
| 5. Low-expansion insulation in the perimeter gap | Foam applied in beads, filling the cavity without pressure on the frame | Crammed full or overfilled, bowing the frame inward and jamming the sash |
| 6. Weep holes and drainage paths | Exterior weeps open and downhill, sill pan sloped to the outboard edge | Weeps caulked shut "for neatness" or a level sill pan that holds water |
| 7. Operation and hardware | Every sash opens and locks smoothly, adjusts true, tilt-in and screen functions work | Locks need force, sashes stick, the crew left without a full-function test |
| 8. Trim, inside and out | Interior casing seated without cracks, exterior trim sealed to shed water over the joint | Caulk as structural filler, unfinished cut edges, casing proud of gaps it hides |
Two rows deserve their own chapters, because they cause the expensive failures: the flashing order in row three decides whether wind-driven rain eventually reaches the wall cavity, and the sealing strategy in row four is where the energy performance lives or dies. The three deep dives below cover those, plus the shimming that keeps everything operating for decades.
Water Management: The Part You Cannot See
Metro Vancouver gets rain measured in metres, and a wall is a drainage system, not a bucket. Follow one raindrop's honest path through a correctly installed window, and every other rule in this guide becomes obvious.
The drop hits the cladding and runs down
Siding, stucco and brick are water-shedding layers, not waterproof ones. The wall expects water behind its first layer and is built to escort it out, which means the window opening is a hole in a designed flow path, not a sealed box.
It reaches the window opening and meets the shingled layers
The weather-resistive barrier is cut and folded into the opening, the sill pan sits beneath the window, and every layer laps over the one below it the way roof shingles do. Water that gets behind anything is still moving downhill, over the top of the next layer.
The sill pan catches what gets past the fin
The pan is a taped, dammed, slightly outboard-sloped tray under the whole window. Even if the perimeter seal ages out in year twelve, the pan intercepts water and directs it to the exterior edge, which is why it is the one piece of the assembly you should insist on photographing.
The weep holes escort it out
At the bottom of the frame and the sill pan, small openings drain to the outdoors. They look like manufacturing details and they are the exit doors of the entire system, which is why the number one install-day crime is sealing them shut for a tidy appearance.
The head flashing throws the entry away
Above the window, head flashing and the head tape order keep water from ever running behind the top of the frame, the reverse-lap failure. Done right, the top of the window is a small roof, and done wrong it is a funnel, and the difference is invisible from inside until it is expensive.
None of this shows in a finished room, which is precisely why it deserves the most scrutiny on the day it disappears. The crews that invite you to look before the trim goes on understand the system; the crews that seal fast and finish faster are not selling speed, they are hiding the part that needs the most time.
Plumb, Level, Square and Shimmed
A window frame is a flexible rectangle until the shims make it true. The unit is fastened through the frame or the nailing fin at specific points, and shims placed at the hinge side, the lock side and the anchors keep the frame from distorting as the fasteners pull it to the rough opening. Get it right and the sash glides on the geometry it was manufactured around; get it lazy and every operation for the next twenty years fights the frame it was forced into.
The symptoms of bad shimming are quiet at first and compound with use. A sash that drifts open on its own is telling you the frame is out of plumb and gravity is steering it. A casement that needs two hands to lock is telling you the lock-side rails are out of alignment, usually a bowed frame from over-shimming at one point or foam pressure from behind. Corner rubbing on a slider is the frame out of square, and the reveal margins around the sash, the gaps that should be even all around, will show the story to anyone who looks for ten seconds.
The homeowner version of the check takes one small level and one slow walk. Hold the level on the frame interior jambs and the sill, sight the reveals for evenness, open and close every operable sash through its full travel, and lock each one with one hand. That sequence catches most shimming sins without removing anything, and it is the same sequence our lead installers run at sign-off before the customer walkthrough, because a frame trued once stays true, and a frame forced never stops reminding you.
Flashing Tape: Order Is Everything
Flashing tape is the stick-and-stretch membrane that waterproofs the window perimeter, and its entire performance is one rule: lap every layer over the one below it. The order is sill first, and widest, then the jambs lapping onto the sill ends, then the head last, lapping over the jamb tops. Done in that sequence, every seam faces downhill and the assembly works like roof shingles around a hole. Done in any other order, a corner somewhere funnels water behind the layers instead of over them, and that funnel works quietly for years.
The critical detail hiding in that order is the head. The top edge of the window must never be sealed to the water-shedding layer above it, because the wall above expects to drain behind the cladding and over the window. Head flashing, or the window's own drip cap, kicks that flow out past the face, and the weather-resistive barrier above is slit and folded so the layers stay shingled. A crew that tapes the head flat, sealing the top edge to the WRB above, has just installed a dam and a funnel in the same motion, and it is the single most consequential ten minutes of the entire project.
At the sill, the modern standard is a real pan, a continuously taped tray with end dams and a back dam, sloped toward the outboard edge, under the window. On paper it is redundant with the fin and the sealant, and in year ten it is the reason a fifteen-year-old window has a dry wall behind it. Ask for it explicitly, ask to see it before the window is set, and photograph it, because the sill pan is the only part of a window job that cannot be inspected ever again after that morning.
Foam, Backer Rod and the Sealant Joint
The gap between the window frame and the rough opening is the performance seam of the whole assembly, and quality fills it in two deliberate layers. From the exterior, a joint: backer rod pressed into the gap to give the sealant the correct depth profile, then a flexible sealant tooled into a continuous bond, forming the water-shedding, movement-tolerant outer line. From the interior, insulation: low-expansion foam applied in beads, filling the cavity airtight without pressing on the frame. Two layers, two jobs, and the mistakes come from confusing them.
- Foam is not sealant. Packing the perimeter with foam and calling it sealed skips the joint entirely: foam is not a weather plane, it degrades under sun and water, and it has no defined movement capacity. The exterior joint needs backer rod and proper sealant, full stop.
- Sealant needs something to push against. A bead laid into an open gap bonds to the sides and tears at the middle, which is why backer rod sits behind it, giving the joint a two-to-one width-to-depth profile that flexes instead of failing.
- Low-expansion, in beads, never packed. The wrong foam, or the right foam applied in one solid blast, cures expanding and bows the frame inward, which shows up weeks later as sashes that stick. Quality looks modest: a couple of passes, checked, topped up.
- The interior seal is the air seal. The airtight line belongs on the interior face, sealant or membrane from frame to the interior wall plane, so moist indoor air never reaches the cold cavity, where it would condense and feed the wall the failure it never needed.
The two-seal strategy is why a well-installed window can be simultaneously watertight against a February storm and airtight against the heating bill, with a drained cavity in between that stays dry because both jobs were done separately and well. It is also the chapter where trim hides the answers fastest, so the walkthrough should happen while the perimeter is still visible and honest.
Full-Frame vs Insert Retrofit
Two legitimate install methods exist, and choosing between them is a scope-and-condition decision, not a preference. A full-frame replacement removes the entire old window, sash and frame down to the rough opening, and installs the new unit complete with new insulation, flashing and interior finishes. An insert, or pocket, retrofit keeps the existing frame in the wall and fits a new sash-and-glass unit inside it, preserving the interior trim and the exterior cladding line, at the cost of some glass area and any access to the wall behind the frame.
| Decision factor | Full-frame replacement | Insert retrofit |
|---|---|---|
| Condition of the existing frame | Full-frame when the old frame is rotten, out of square or aluminum with no thermal break | Insert only when the old frame is sound, square and rot-free |
| Access to the wall cavity | Full access to insulate, flash and integrate the water barrier correctly | None: the perimeter stays whatever it was, which is the honest limit of the method |
| Glass area | Restores the original opening size fully | Smaller by the frame-within-frame geometry, visible on wide units |
| Interior trim and finish work | New interior casing, painted and finished | Existing trim preserved, fastest and least dusty |
| Where it shines | Old-stock walls, failed envelopes, energy-driven projects | Condos, heritage interiors, sound structures with worn glass |
| Strata and rentals | Longer approvals, more finish scope | The common choice where scope must stay tight |
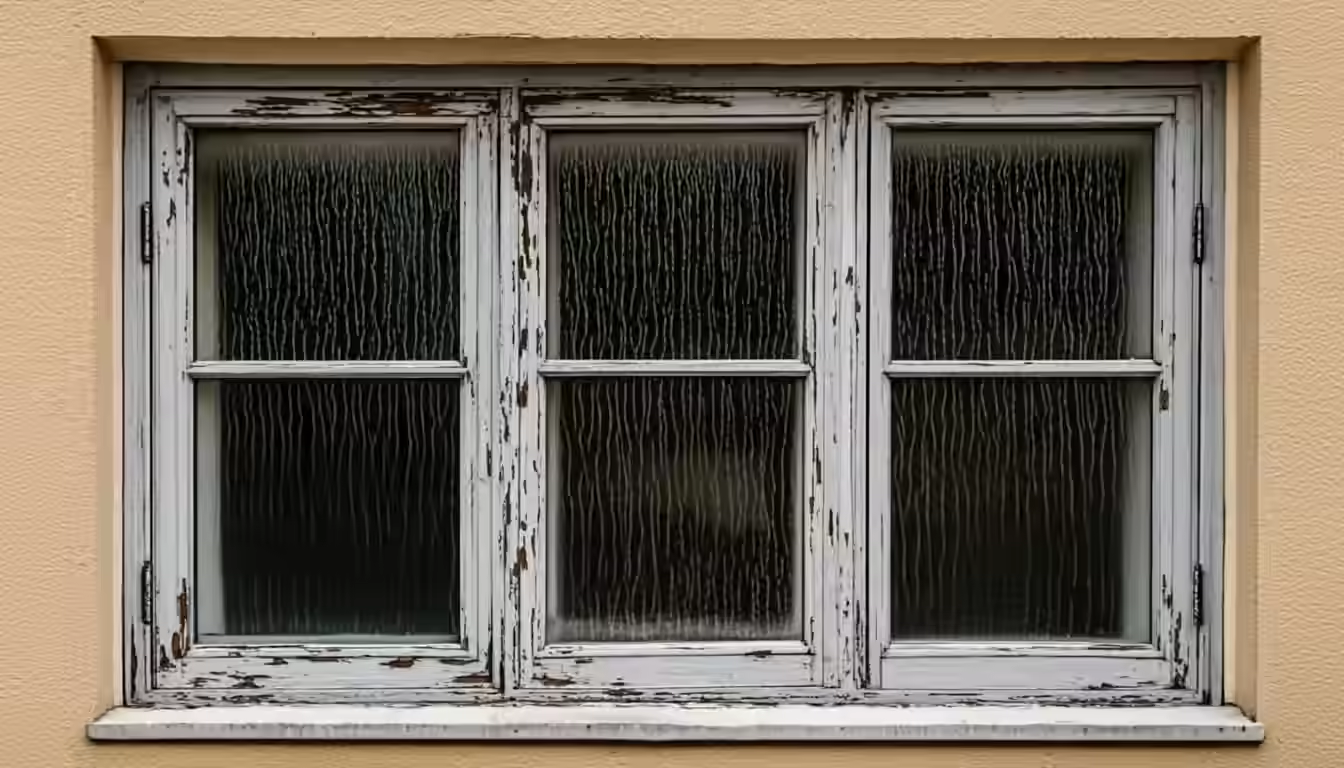
The honest tiebreaker is water history. If the wall around an old window shows any stain, swelling or softness, the insert path seals the evidence in with the frame, and full-frame is the correct scope, and our Burnaby window installation crews walk that decision with the moisture meter rather than the brochure. Where the frame is sound and the goal is glass performance in a sound wall, the insert is a legitimate, tidy method, not a compromise.
Signs of Trouble in the First Year
Install errors have a timeline, and the first year is when most of them announce themselves. The table below pairs the symptom with the usual root cause, and the pattern to respect is this: water problems announce after rain, air problems announce in cold, and operation problems announce immediately or not at all. Anything still misbehaving at the four-season mark deserves a professional re-inspection before the warranty conversations get harder.
| The symptom | The usual install cause | The honest response |
|---|---|---|
| Sash sticks or drifts within weeks | Frame bowed by overfilled foam or a single-point shim | Adjustment visit now, before the hardware wears to match the distortion |
| Draft felt along the frame perimeter | Missing interior air seal, foam-only perimeter, or unsealed sill joint | Smoke-pencil test at the perimeter, then seal the specific gap properly |
| Fog inside a brand new sealed unit | Handling damage or a stressed installation distorted the unit | Warranty claim immediately, this is the manufacturer line doing its job |
| Water on the sill after wind-driven rain | Weeps blocked, sill pan absent or level, head flashing reversed | Trace the path before re-caulking, because sealing the exit is the worst fix |
| Stain or swelling in the reveal below the window | Water reaching the wall cavity through a perimeter or flashing path | Open the trim, find the entry, repair the layer, not the stain |
| Sealant pulling from frame or wall within months | No backer rod, bonded to dust, or wrong product for the joint | Cut out and redo the joint properly, a surface patch will not survive |
| Cold radiating strongly at the glass edge | Uninsulated perimeter gap, thermal bridging left unaddressed | Thermal camera or hand map, then foam the cavity correctly |
The pattern worth repeating to yourself through that first year: symptoms that follow the weather map to water and flashing, symptoms that follow the thermostat map to air and sealing, and symptoms that follow the calendar of use map to shimming and hardware. That one sentence turns most first-year mysteries into a chapter of this guide.
How to Verify on Install Day
Verification is a schedule, not an attitude. The windows arrive, the openings come apart, the new units go in, and each of the eight checks has a moment when it is checkable and a moment after which it is hidden forever. This sequence keeps you in the room for the honest minutes without standing over anyone all day:
Photograph every opening before anything is touched
The existing window, the interior reveal and the exterior wall each get a photo, for the before-and-after file and for the condition record. Ten minutes, one camera, permanent value.
Ask to see the sill pan at the first window
When the crew tapes the sill pan before setting the first unit, look at it, photograph it and ask about the end dams. The first window sets the standard for the whole order, and good crews are glad to show it.
Watch one fin and flashing sequence
Stay for the fin fastening and the flashing order on one window, sill to jambs to head, and watch the head flashing go on last. One honest observation window, then the crew works unwatched and you both prefer it.
Check the foam depth at the perimeter
While the interior gap is still open, look for beads rather than a packed blast, and for a frame that stays true as it cures. The two minutes here prevent the bowed-frame callback months later.
Operate every sash before the crew leaves
Full travel, tilt-in, locks one-handed, screens in and out, on every operable unit, on the walkthrough. Anything that needs adjusting gets adjusted while the installers, their tools and their shims are still on site.
Get the paperwork before the truck leaves
Labels photographed or kept, spec sheets and the warranty registration completed, and the workmanship terms in writing. Our crews leave with the 2-year workmanship warranty documented and the manufacturer registrations filed for you.

The sequence costs you perhaps forty minutes across a whole day, and it buys the only chance anyone will ever have to verify the invisible three-fifths of the job. It is also, not coincidentally, the presence that keeps every crew on its best standard, including ours.
Warranties: Glass, Seal and Workmanship
A window purchase carries two warranty layers that most owners discover only at the worst moment. The manufacturer warranty covers the product, the sealed glass unit, the coatings, the hardware and the profile, and it is engineered around the assumption of a correct installation. The workmanship warranty covers the labour, the flashing, the sealing, the shimming and the finish, and it is only as strong as the company standing behind it, which is why ours is written, flat-rate priced and two years long, backed by a BC licensed, $2M insured operation that has been in the field since 2010.
The intersection of the two layers is where claims go to die. A fogged sealed unit in year three is a manufacturer claim on paper, but if the failure traces to a frame bowed by install-day foam overfill, both layers point at each other and the homeowner is between them. The defence is the discipline this guide has been teaching: install to the eight checks, document the day, photograph the sill pan, keep the labels, and the intersection never has to be tested.
Pricing sits on the same honesty. Installed replacement bands run $650 to $950 for picture units, $800 to $1,400 for casements, $1,200 to $3,500 for sliders and $3,200 to $6,500 for bay and bow assemblies, with entry doors at $2,400 to $4,800, patio doors at $3,200 to $6,500 and full-home packages between $12,000 and $30,000. Quality installation is inside those numbers, not an upsell beside them. Rebate programs through FortisBC and CleanBC change year to year, and when one is live for your project it may apply — we check eligibility and handle paperwork, and the full buying framework is in our window replacement guide for Vancouver homes.
Want the Install Standard in Writing?
Flat-rate quotes that include the flashing, sealing and shimming standard this guide teaches, with a 2-year workmanship warranty. Call 604-615-2212 or request a free measure.
City Notes Across Metro Vancouver
Installation standards are universal, and the wall conditions that test them are local. These are the housing-stock patterns our install crews plan around by city.
Rain exposure and cladding age decide how much the water chapters of this guide matter at your address, and the Langley windows and doors crews work one of the region's deepest inventories of tired wood-frame walls, where the full-frame-versus-insert call is decided by the moisture meter more often than the budget.
Vancouver
Character homes with original single pane and aluminum frames: the wettest glass in the region, and the clearest humidity signals.
Surrey
Mixed stock from 1970s sliders to new builds: new construction carries its own first-winter moisture story.
Burnaby
Post-war bungalows and half-storey additions where upstairs bedrooms fog up first every October.
Coquitlam
Hillside and Ravine Park homes where shaded north walls run colder and the glass tells you first.
Richmond
Slab-on-grade homes and river-level air: humidity runs high and window glass is the first gauge.
Langley
Larger family homes with more showers, more plants and more laundry drying indoors all winter.
The Cheat Sheet
The eight, the three deep dives and the first-year map, one dark table to hold at the walkthrough.
| Moment | The honest call |
|---|---|
| Before signing | Install standard in the quote, sill pan and flashing order named, workmanship warranty in writing |
| While openings are open | Sill pan photographed, fin and flashing order watched once, foam applied in beads |
| At the walkthrough | Every sash full-travel tested, locks one-handed, labels and registrations handed over |
| First rain | Check sills and reveals, expecting dry: water on the sill means weeps or flashing, act early |
| First cold snap | Hand-map the perimeter for drafts, seal specific gaps properly rather than patching |
| First year of use | Sticking or drifting sashes get adjusted before hardware wears to match the distortion |
| Anytime | A quality install is in the price band: $650 to $950 picture units, $12,000 to $30,000 full homes |
Verify the invisible while it is visible: the sill pan, the flashing order, the foam depth. Everything else in a window job can be inspected later, or was done right the first time.
Frequently Asked Questions
Services From This Guide
Flat-rate written pricing with the flashing, sealing and shimming standard built in, picture units from $650 to $950 and full-home packages from $12,000 to $30,000, held to our 2-year workmanship warranty.
Window replacement
Install standard written into every flat-rate quote, from $650 to $950 picture units to $12,000 to $30,000 full-home packages.
Langley window installs
Wood-frame wall country, where full-frame scope and moisture-meter decisions protect tired envelopes.
Coquitlam window installs
Hillside exposure and big view glass carried with rated hardware and the eight-check walkthrough.
24/7 emergency response
Sudden water and glass events answered around the clock, average 45 minutes, $150 flat after-hours premium posted.
/div>Related Guides
Window Replacement in Vancouver
The full buying guide: measuring, permits, price bands and what the install scope should include.
RebatesCleanBC Rebates Guide
The efficiency programs that quality glass can qualify for, and the paperwork order that captures them.
EfficiencyEnergy Efficient Upgrades in BC
Where windows sit in the whole-house envelope plan, and the order of work that pays first.
/div>
Red Seal certified, licensed gas fitters (BC-PL-2019-4421), $2M insured and 15-plus years in the field, with more than 12,000 jobs completed across Metro Vancouver since 2010 and a 5.0-star rating across 26 Google reviews. We wrote this guide because the difference between a good window year and a wall repair is almost always the install, and every one of the eight checks is verifiable by the person paying for it. Our crews are held to this exact list with a 2-year workmanship warranty behind it, and the walkthrough steps are the ones our lead installers run on every order before the truck leaves. To book instead of DIY, see window & door service in Delta — same-day across the city.
More about our team →Want the Install Standard in Your Quote?
Book a free in-home measure with a Red Seal estimator. You get the install standard written beside the price, a fixed quote for the package, and financing from 7.99 percent with approved credit if the order wins. Zero obligation, quotes on most calls within days. If you would rather hand this to a pro, our window & door services pages cover Metro Vancouver.
Windows measured, but you want them installed right?
Free measures with the install standard in writing are usually booked within days across Vancouver, Burnaby and Surrey, and after-hours glass emergencies carry the $150 flat premium posted in advance.
Call 604-615-2212 WhatsApp Us